

Over the past few weeks, we’ve covered everything from the open-source announcement to evaluating, deploying, and migrating. Today, we want to share a change that makes evaluating ZSvirt faster: the download center now offers qcow2 and OVA images.
Trying ZSvirt used to mean either provisioning a physical server or mounting the ISO inside a VM and walking through a full installation. For teams that just want to see whether it works, that’s a real barrier to entry.
Not anymore. Download a qcow2 or OVA file, create a VM on your VMware, VirtualBox, KVM, or cloud host, boot it, set an IP — and the ZSvirt management node is ready. No physical hardware required.
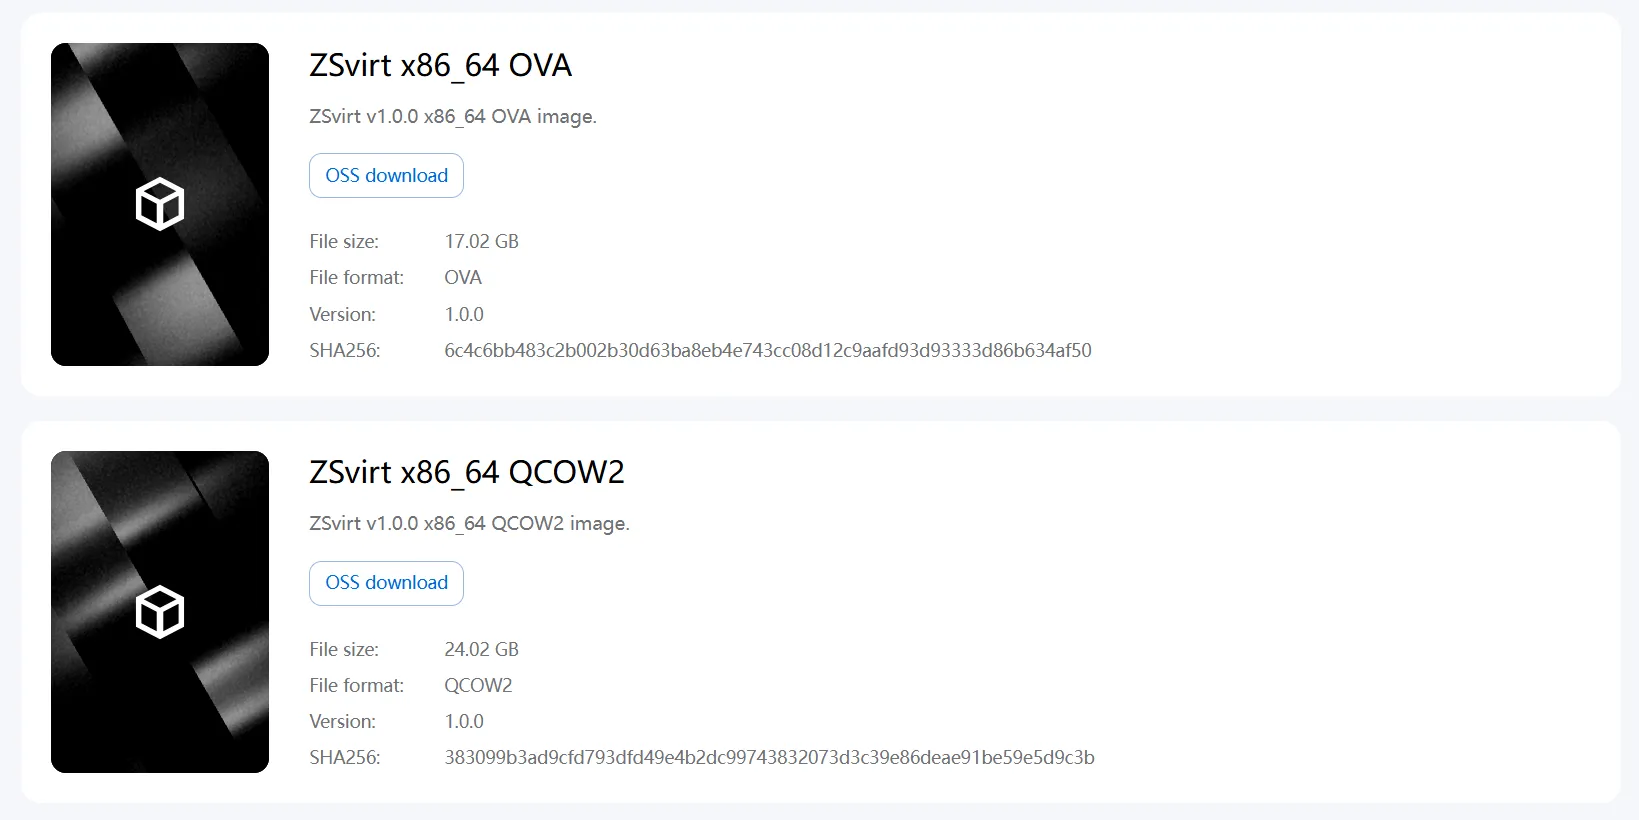
Head to the download center to see the newly added packages:
Why qcow2 and OVA
The ISO targets a from-scratch install: an installer guides you through selecting the system disk, configuring the network, and setting the root password. qcow2 and OVA are prepackaged VM images — the OS and management-node services are already baked in, so they boot straight into a working state and skip the entire installer interaction.
The two formats complement each other for different runtime environments:
| Image format | What it is | Typical environment |
|---|---|---|
| qcow2 | Standard KVM/QEMU disk format; compact and grows on demand | KVM, cloud hosts |
| OVA | A packaged VM template; import it and get a complete VM | VMware Workstation / ESXi, VirtualBox |
The ISO installer still fits production rollouts and brand-new hardware. qcow2/OVA are the lighter path for evaluation, PoC, and lab environments.
Before You Start: What You’ll Need
The bar is low — a single VM can act as the management node. Create it with these settings:
| Item | Recommendation |
|---|---|
| CPU | 16 vCPUs (the OVA image’s default) |
| Memory | 16 GiB (the OVA image’s default) |
| System disk | The downloaded qcow2 or OVA image |
| NIC | At least one virtual NIC on the management network |
| IP | An available management-node IP, netmask, and gateway |
One easy pitfall to avoid: running virtualization inside a VM requires nested virtualization support from the hypervisor. On VMware, when creating or importing the VM, check Expose hardware assisted virtualization to the guest OS in the processor settings. VirtualBox, KVM, and cloud hosts each have their own toggle, covered in the scenarios below.
Scenario 1: VMware with OVA
OVA is the most natural format for the VMware ecosystem.
- Download the
.ovafile from the download center; - In VMware Workstation, choose File → Open and select the downloaded OVA to import it;
- Edit the VM settings and confirm CPU and memory meet the requirements (the OVA ships with 16 vCPUs / 16 GiB by default; keep or adjust as needed);
- Under Processors, check Virtualize Intel VT-x/EPT or AMD-V/RVI (the equivalent ESXi option is Expose hardware assisted virtualization to the guest OS);
- Power on, open the console, and proceed to initialization below.
Scenario 2: KVM/QEMU with qcow2
qcow2 is the native KVM/QEMU format — attach it directly as a disk.
When creating a VM in virt-manager, choose Import existing disk image, point to the downloaded qcow2 file, allocate 8 vCPUs / 8 GiB, and boot. The same works from the command line with virt-install:
virt-install \
  --name zsvirt-mn \
  --vcpus 8 \
  --memory 8192 \
  --disk path=/var/lib/libvirt/images/ZSvirt-x86_64-<version>-h84r.qcow2,format=qcow2,device=disk \
  --network network=default \
  --import
If virtualization doesn’t work inside the guest, first confirm nested virtualization is enabled on the host:
cat /sys/module/kvm_intel/parameters/nested   # Intel
cat /sys/module/kvm_amd/parameters/nested     # AMD
An output of 1 or Y means it’s enabled; otherwise, add nested=1 to the KVM kernel module and reload it.
Scenario 3: VirtualBox and Cloud Hosts
VirtualBox: the easiest path is OVA — File → Import Appliance, then select the downloaded OVA. After importing, enable Nested VT-x/AMD-V under System → Processor.
Cloud hosts: pick an instance type that supports nested virtualization (offerings vary by provider — typically bare-metal or specific performance instance families). Create a cloud host from the qcow2 as its system disk, or upload it to the image service first and create an instance from it.
First Boot and Initialization
Whatever the environment, initialization after first boot is the same.
Step 1: Log in and change the password. Press Ctrl+Alt+F2 in the console to switch to the login terminal and sign in as root. The default password is zsvirt.123 — run passwd right after logging in and change it. That’s a habit worth keeping in any environment.
Step 2: Configure the network and start the services. Two cases:
When the management network has DHCP, first check the address the NIC picked up:
ip addrWrite the address into the management-node config and start the services:
zstack-ctl change_ip --ip <management-node-ip>
zstack-ctl start
Without DHCP, create a bond and assign a static address manually:
# Create bond0
zs-bond-ab -c bond0

# Add the management NIC to bond0
zs-nic-to-bond -a bond0

# Assign a static address to bond0 (IP, netmask, gateway, in that order)
zs-network-setting -i bond0 <management-node-ip> <netmask> <gateway>
Once networking is ready, run zstack-ctl change_ip --ip <management-node-ip> and zstack-ctl start to finish initialization.
Step 3: Open the web UI. Point your browser at https://<management-node-ip> and follow the wizard to initialize the platform, then add hosts, storage, and networks and create your first VM. For the full flow, follow the quick-start tutorial.
Going Further: The Same Image Can Act as a Compute Node
If you only need this node as a compute node joining an existing cluster, you can skip the zstack-ctl change_ip and zstack-ctl start steps — the image supports that use case too. A management node, by contrast, runs the full control-plane services.
Troubleshooting Cheat Sheet
| Symptom | Check first |
|---|---|
| UI won’t load | Is the VM running? Is the management NIC attached to the right network? |
| Wrong IP / netmask / gateway | Was zstack-ctl change_ip --ip <management-node-ip> run with the correct value? |
| Services not started | Was zstack-ctl start run, and did you wait for startup to finish? |
| No external access | Can a workstation or another host reach the management-node IP? Is port 443 open in the firewall? |
| Virtualization unavailable | Is nested virtualization enabled on the hypervisor? (see scenarios above) |
More detailed troubleshooting is in the docs: Nested Virtualization Management Node.
What’s Next
- Download the qcow2 / OVA images
- Follow the quick-start tutorial to create your first VM
- Migrating from VMware? Read ZSvirt Migration in Practice: Three Ways to Migrate VMs
- For a systematic evaluation, work through the PoC guide
We’ve always believed a good evaluation should start at the lowest possible cost. Now, a single VM is enough.
Join the Community
- Issue tracker: GitHub Issues
- Community discussions: GitHub Discussions
- Social media:
- YouTube: https://youtube.com/@ZSvirt
- LinkedIn: https://www.linkedin.com/in/zsvirt-community/
- X/Twitter: https://x.com/ZSvirt
- Discord: https://discord.com/invite/KHsw63z9xA
- Email: community@zsvirt.io