

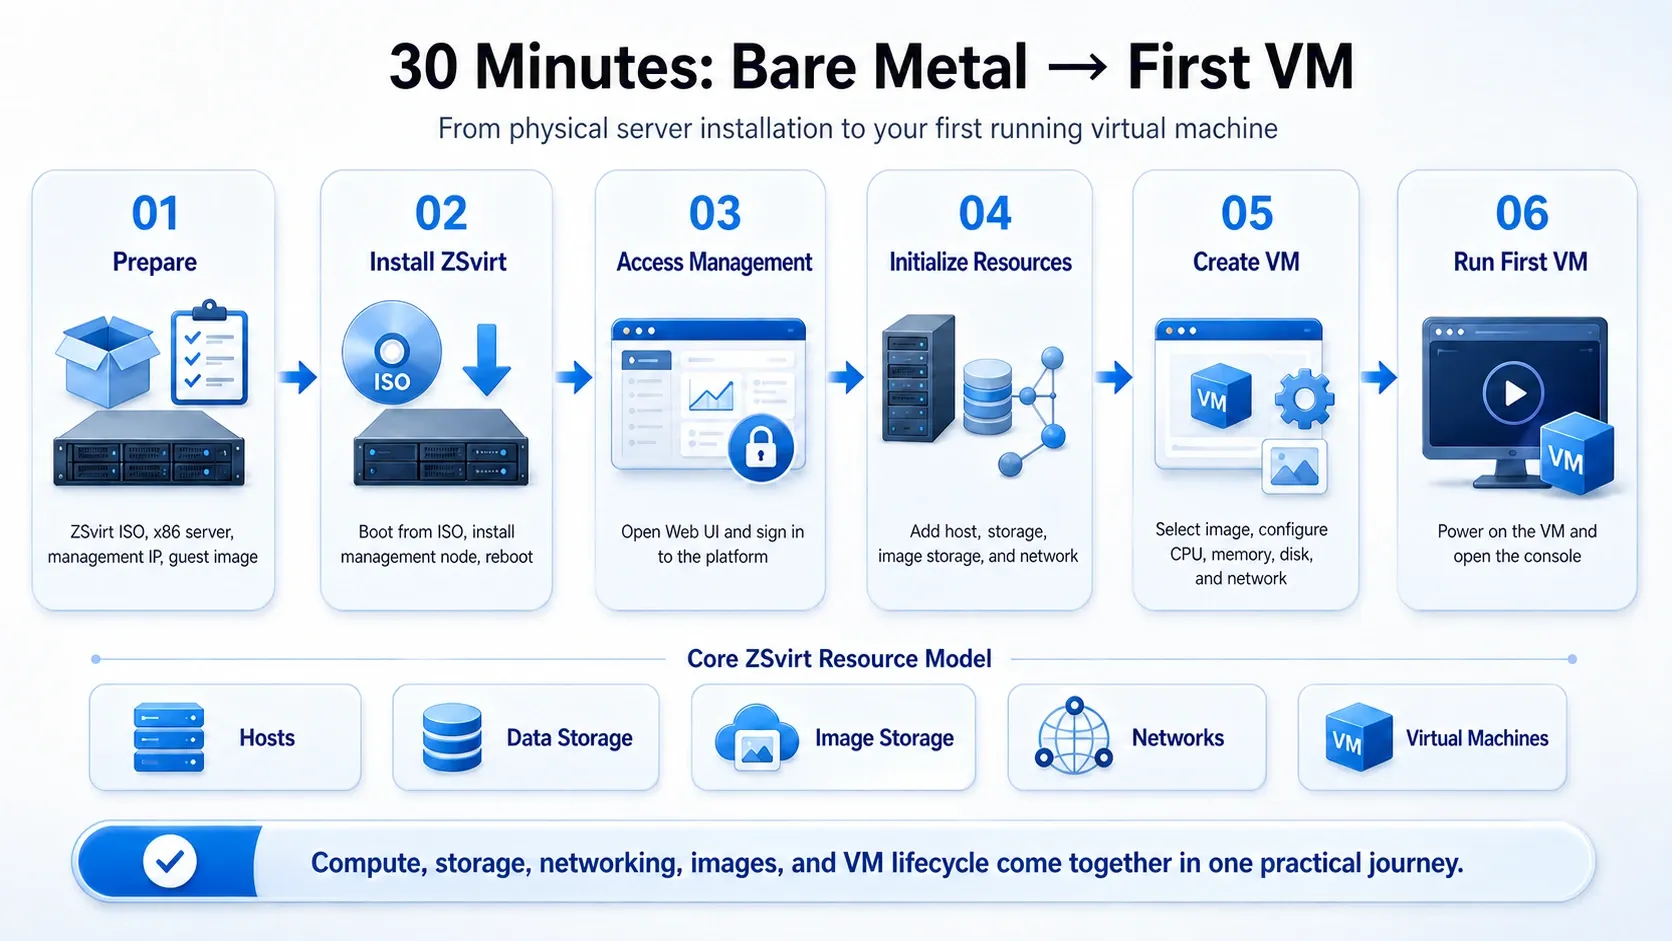
Over the past few weeks, we’ve covered deploying ZSvirt, creating your first VM, and migrating VMs from VMware. This post distills the core journey into its shortest form: one server, one ISO, about 30 minutes of hands-on work, and a running guest at the end.
Introduction
How quickly can you go from a bare-metal server to your first running VM?
This article follows a simple first-VM journey with ZSvirt. In about 30 minutes of hands-on work — assuming the installation media and guest image are already available — you can install the management node, initialize a minimal environment, and bring up your first virtual machine.
ZSvirt provides a centralized platform for managing the core resources behind virtualization: hosts, storage, networks, images, and virtual machines.
Before You Start
Keep the preparation simple. For a small lab or proof-of-concept, have the following ready:
- A ZSvirt installation ISO
- One physical x86 server with hardware virtualization enabled
- A planned static management IP address, gateway, DNS, and hostname
- Network connectivity between the server and your management workstation
- A guest operating system image:
- An Ubuntu Server ISO for an installer-based VM, or
- A ready-to-use
qcow2orrawsystem image for the documented Quick Start path
A single-server all-in-one lab is sufficient for this first-VM workflow.
Install ZSvirt
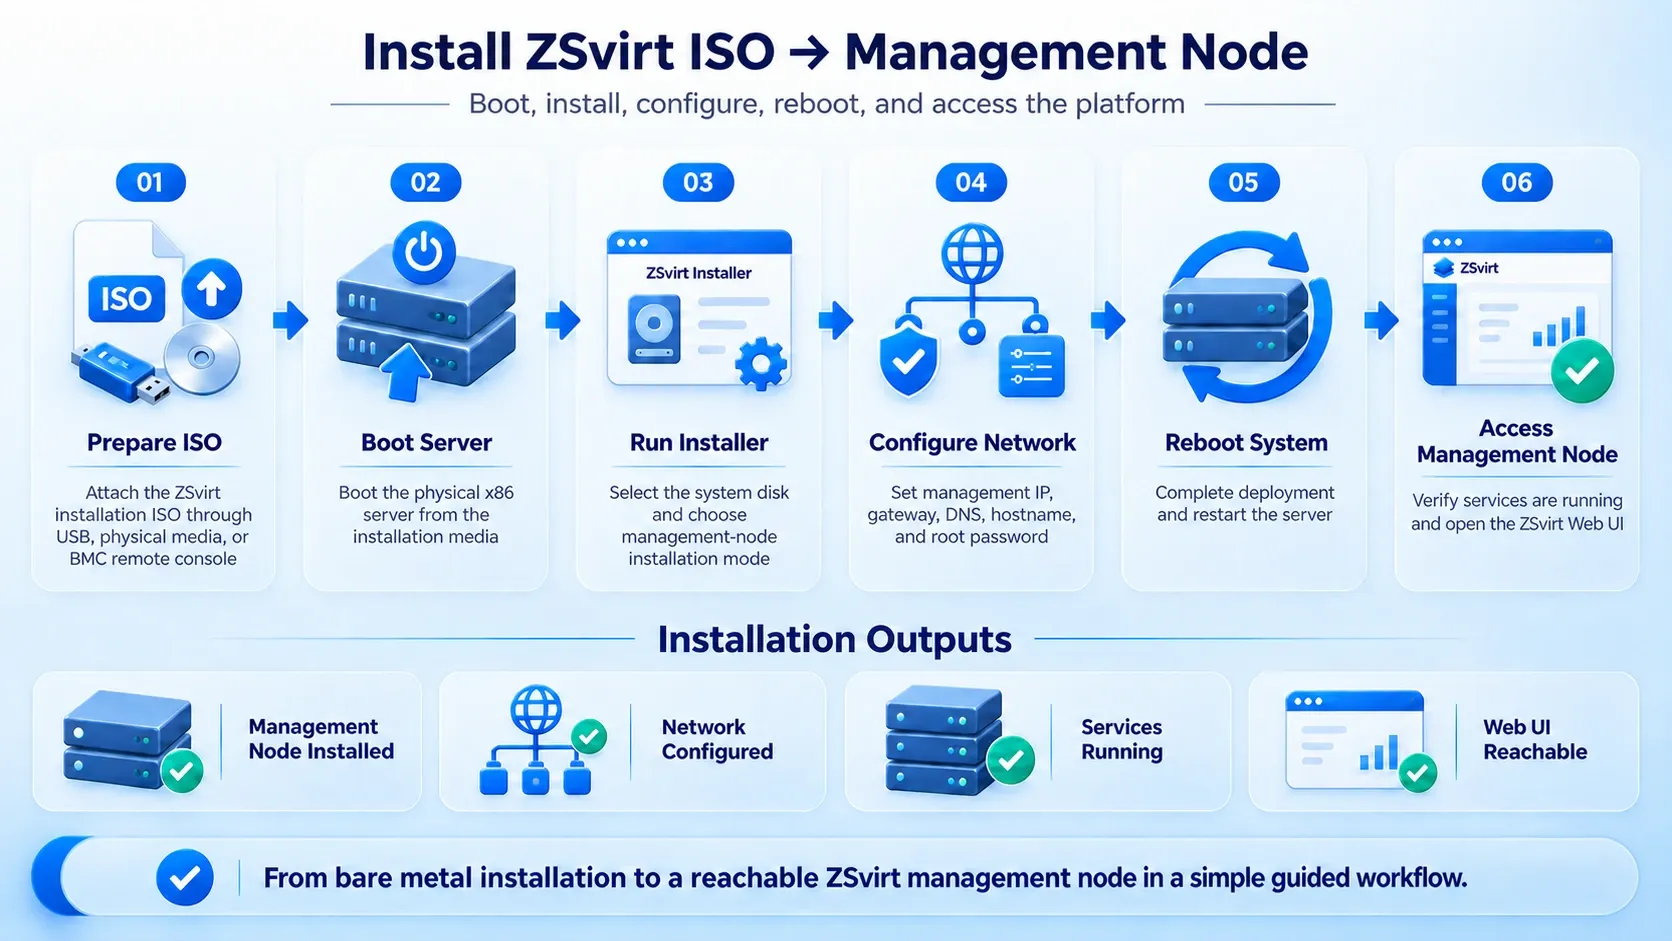
Attach the ZSvirt ISO and boot the server from the selected installation media. In the installer, select the system disk, configure the management node and network settings, set the root password, and reboot. After the restart, confirm that the management node and Web UI are reachable.
Explore ZSvirt for the First Time
From a management workstation, enter the management node’s IP address in a browser and sign in to the ZSvirt management interface. Change the initial administrator password immediately after first login.
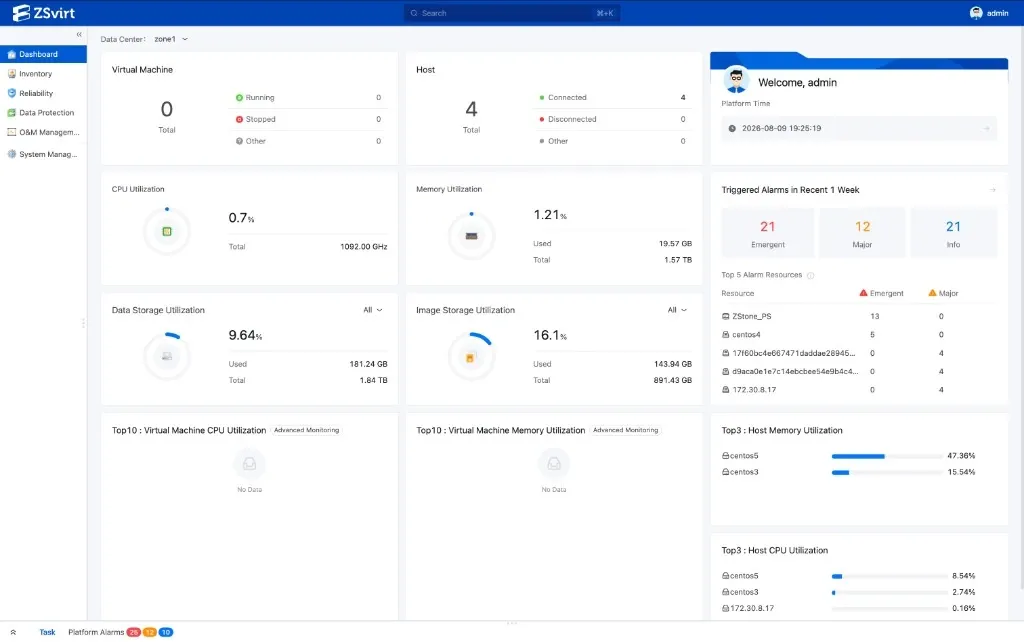
The resource model diagram below shows how compute, storage, images, networking, and virtual machines work together. For a minimal environment, create one datacenter and one cluster, then add the physical server as a host, a datastore, image storage, and a distributed switch with a distributed port group for VM connectivity.
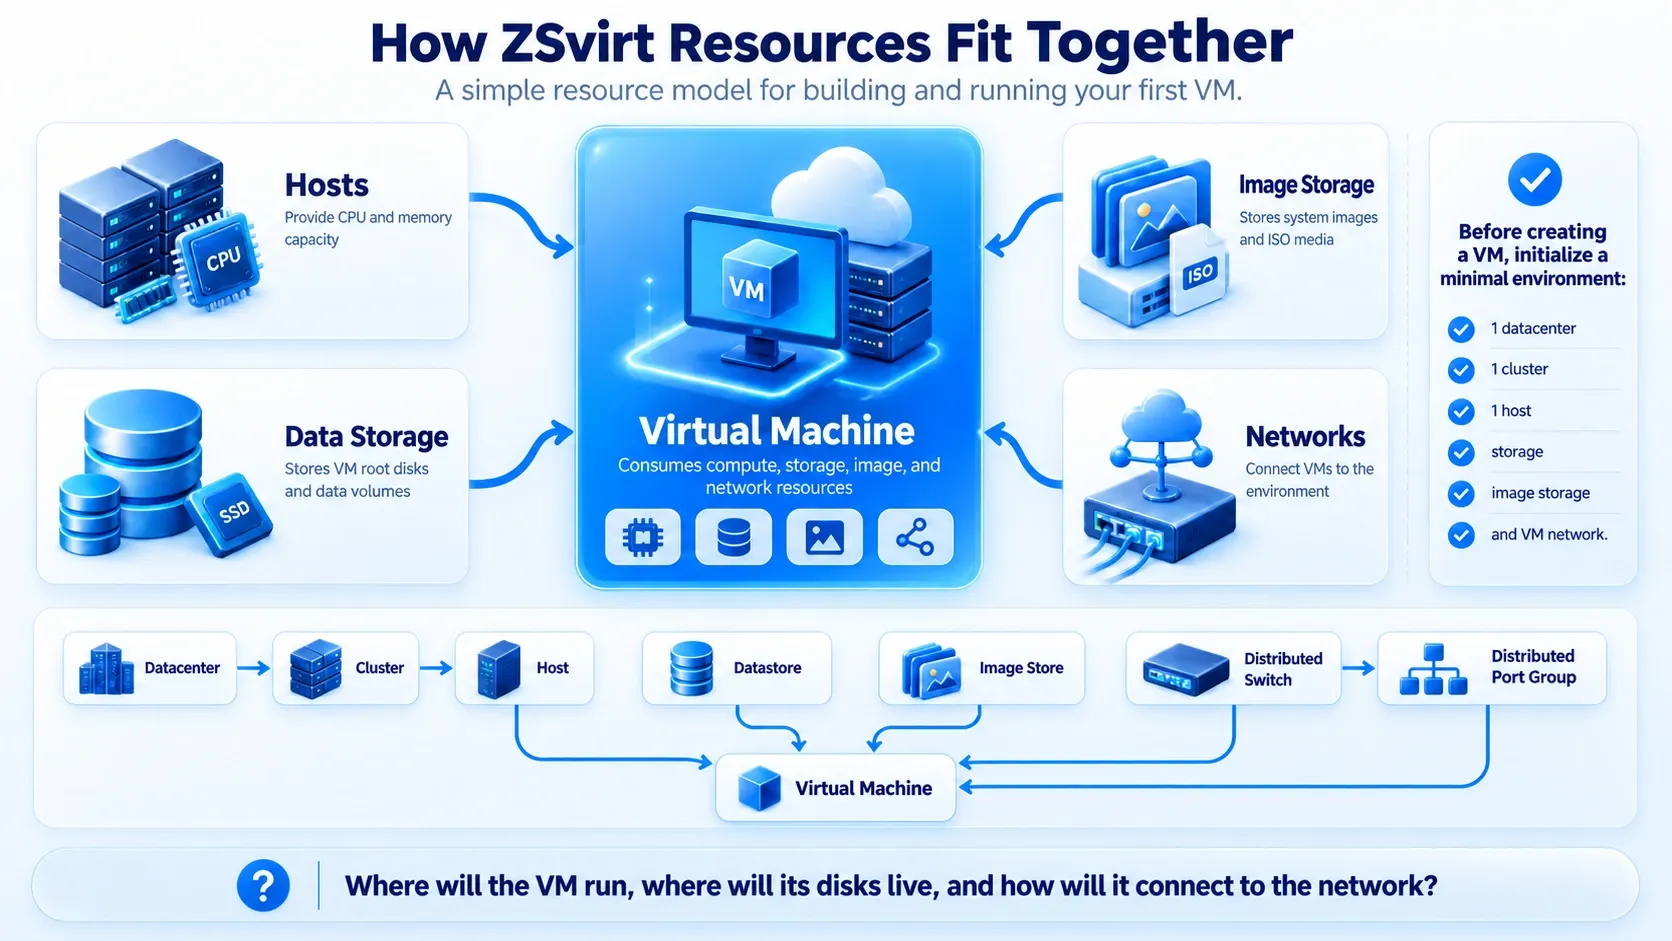
This sequence will feel familiar to experienced VMware, Hyper-V, or Proxmox users. The names may differ, but the underlying question remains the same: where will the VM run, where will its disks live, and how will it connect to the network?
Create Your First VM
This is where the environment becomes tangible.
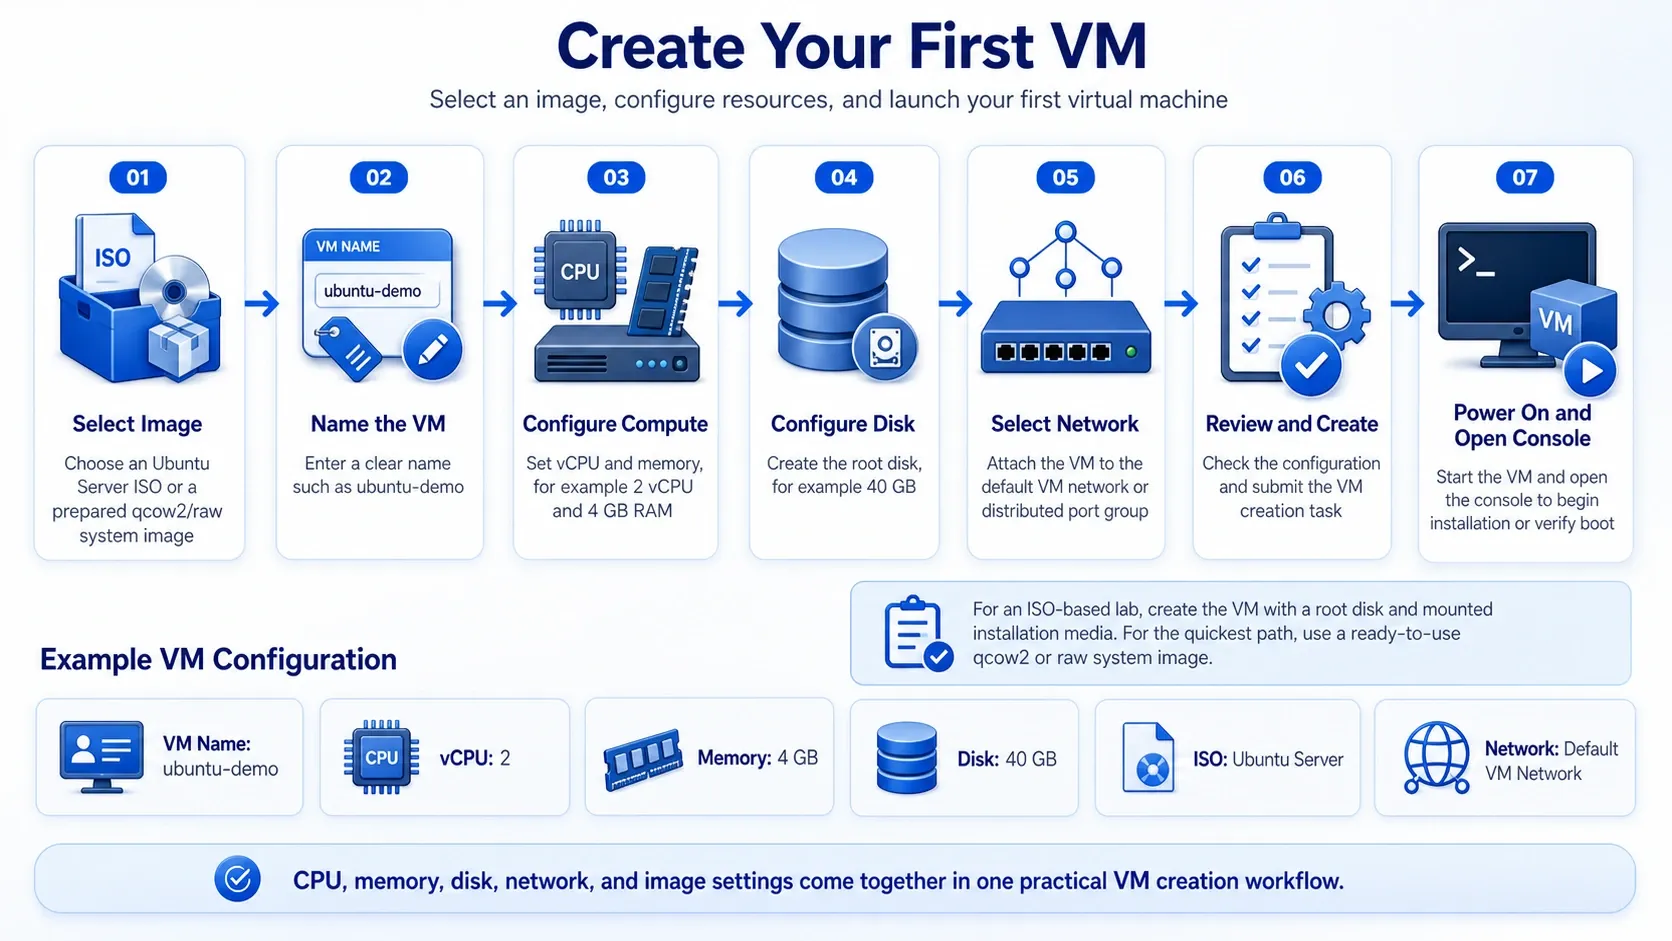
Before creating a VM, add the guest image to image storage. For an ISO-based lab, create a VM with a root disk and mounted Ubuntu Server installation media. For the quickest path, use a ready-to-use qcow2 or raw system image.
For a simple ISO-based lab, use the following example:
| Setting | Example |
|---|---|
| VM Name | ubuntu-demo |
| vCPU | 2 |
| Memory | 4 GB |
| Disk | 40 GB |
| ISO | Ubuntu Server |
| Network | Your lab’s default VM network |
After reviewing the configuration, create the VM, power it on, and open the console. The ISO route boots into the Ubuntu installer, while a ready-to-use system image can boot directly into the guest operating system.
Your First VM Is Running
Once the Ubuntu installer appears in the console, your first VM is running and the core workflow is complete.
If you are using the ISO route, complete the Ubuntu installation. After the guest boots, verify that it has received an IP address and can reach its gateway:
ip addr
ip route
ping -c 4 <gateway-ip>
A successful gateway ping confirms that the main infrastructure chain is working: host, datastore, VM network, port group, address assignment, and upstream connectivity.
What’s Next?
With the single-host workflow working, you can continue with VM templates, additional storage and network configuration, VM migration, and cluster or high-availability planning. For a practical next exercise, create a second VM on the same VM network and test connectivity between the two guests.
Conclusion
The real value of these 30 minutes is not just creating one VM. It is getting a first-hand understanding of how ZSvirt works as a virtualization platform.
The journey from ISO to VM shows how management, compute, storage, networking, images, and lifecycle operations connect in a practical environment. That understanding is more useful than a long feature list, because it gives administrators a concrete starting point for deeper evaluation.
When you’re ready to go further, explore ZSvirt, try it yourself, or read the Quick Start documentation.
- Source code: https://github.com/zsvirt/zsvirt
- Download Center: https://zsvirt.io/download
- Documentation Center: https://zsvirt.io/en/docs
Join the Community
- Issue reports: GitHub Issues
- Community discussions: GitHub Discussions
- Social media:
- YouTube: https://youtube.com/@ZSvirt
- LinkedIn: https://www.linkedin.com/in/zsvirt-community/
- X/Twitter: https://x.com/ZSvirt
- Discord: https://discord.com/invite/KHsw63z9xA
- Email: community@zsvirt.io