
Quickly Deploy ZSvirt from a Virtual Machine
This guide explains how to quickly deploy a ZSvirt management node or compute node from a qcow2 or OVA image on a virtual machine. It is intended for local labs, feature evaluation, and PoC setups.
Before You Begin
Have the following ready:
- A ZSvirt qcow2 or OVA image, for example:
ZSvirt-x86_64-<version>-h84r.qcow2ZSvirt-x86_64-<version>-h84r.ova
- A hypervisor that can run qcow2 or OVA images.
- At least
8 vCPUsand8 GiBof memory. - One virtual NIC attached to the management network.
- An IP address, netmask, and gateway you can assign to the ZSvirt management node.
Note
The management node runs ZSvirt control-plane services. If you only need this image as a compute node, skip the management-service initialization commands later in this guide.
1. Download the Image
Download the latest qcow2 or OVA image from the ZSvirt website. Filenames typically look like:
ZSvirt-x86_64-<version>-h84r.qcow2
ZSvirt-x86_64-<version>-h84r.ova
Pick the format that matches your hypervisor, and replace <version> with the actual version number.
2. Create the VM
Create a VM from the downloaded qcow2 or OVA image, using these resource guidelines:
| Setting | Recommended |
|---|---|
| CPU | 8 vCPUs or more |
| Memory | 8 GiB or more |
| System disk | The downloaded qcow2 or OVA image |
| NIC | At least one virtual NIC on the management network |
Note
On VMware, select Expose hardware assisted virtualization to the guest OS when you create or import the VM.
After the VM is created, power it on and open the console.
3. Log In
At the VM console, press Ctrl+Alt+F2 to switch to a login terminal, then log in as root.
The default password is:
zsvirt.123Change the root password as soon as you log in for the first time:
passwd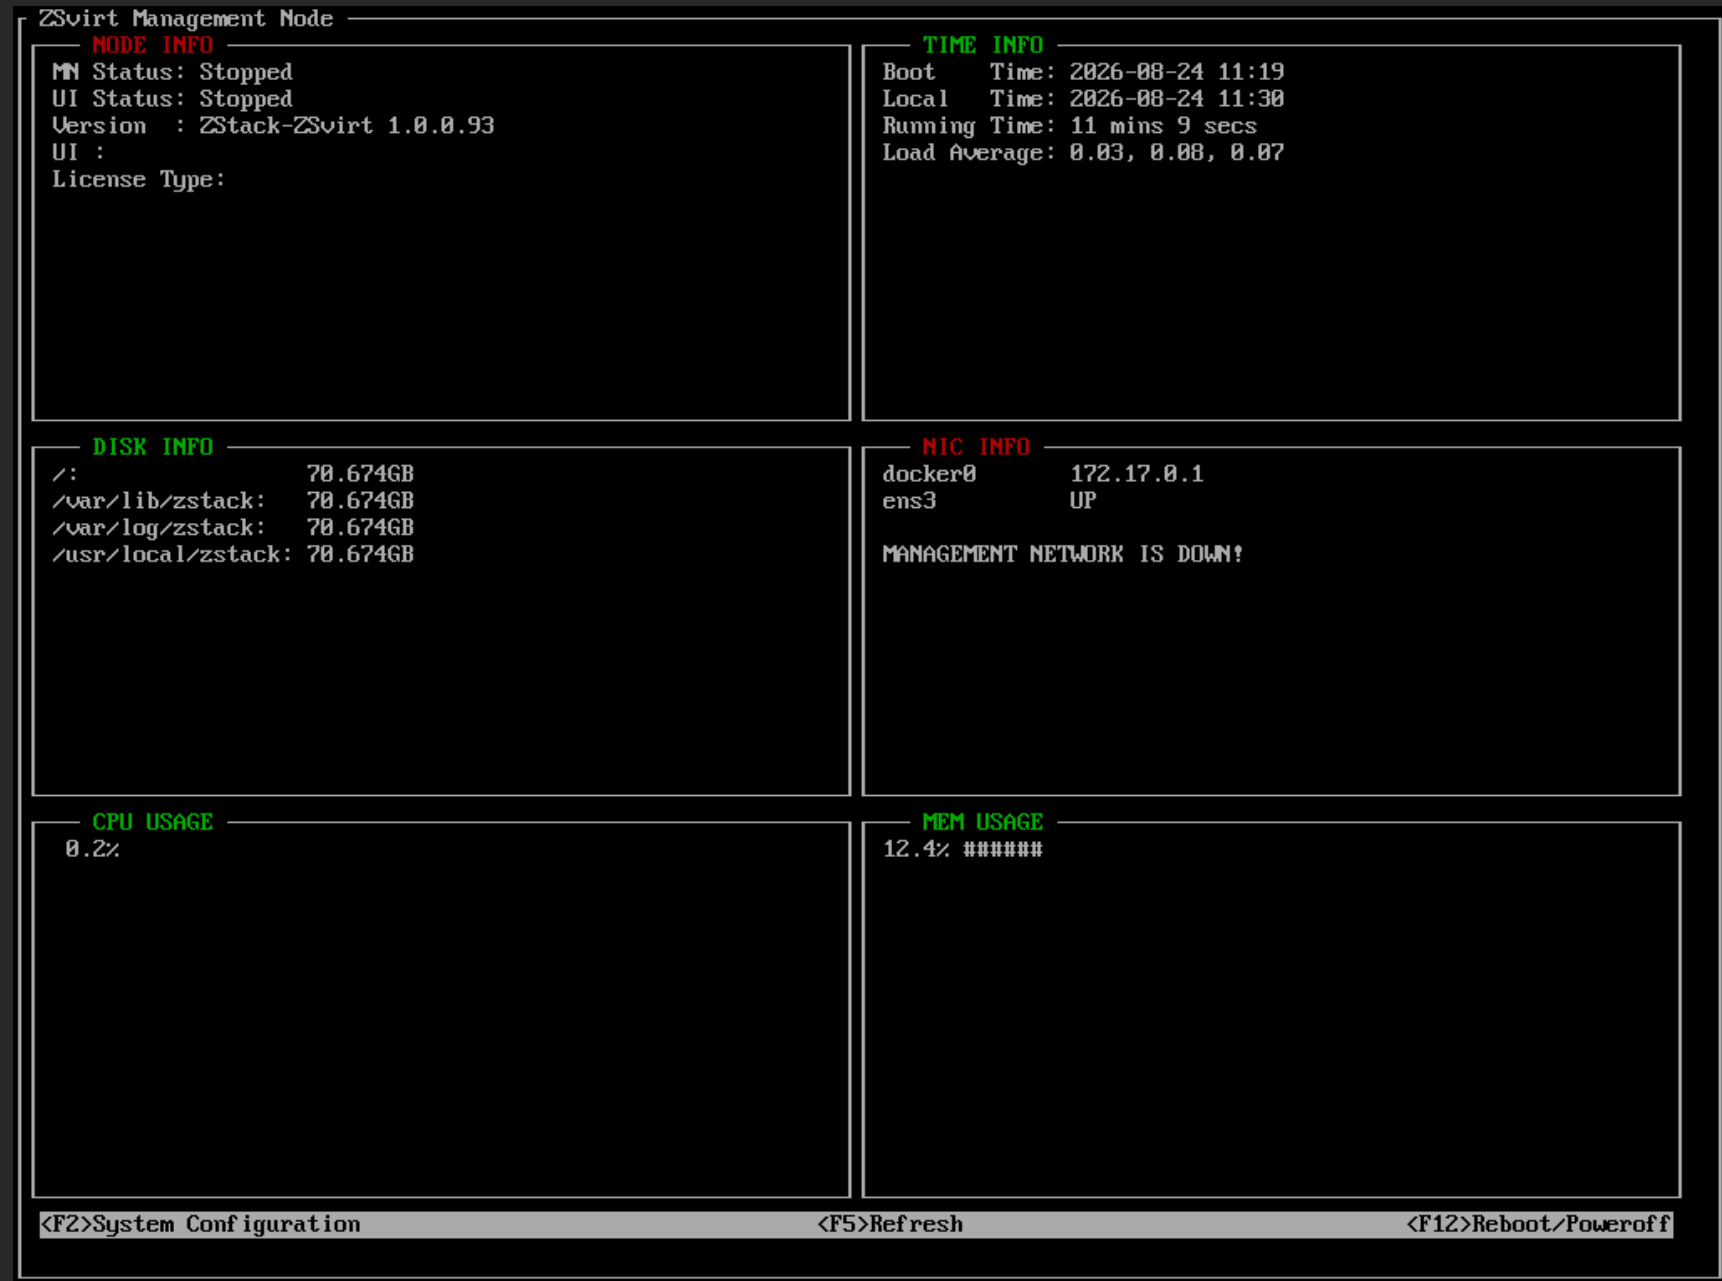
4. Configure Networking and Start Services
Choose the path that matches your network.
If the management network has DHCP
If DHCP assigns addresses on the management network, first check the IP the NIC received:
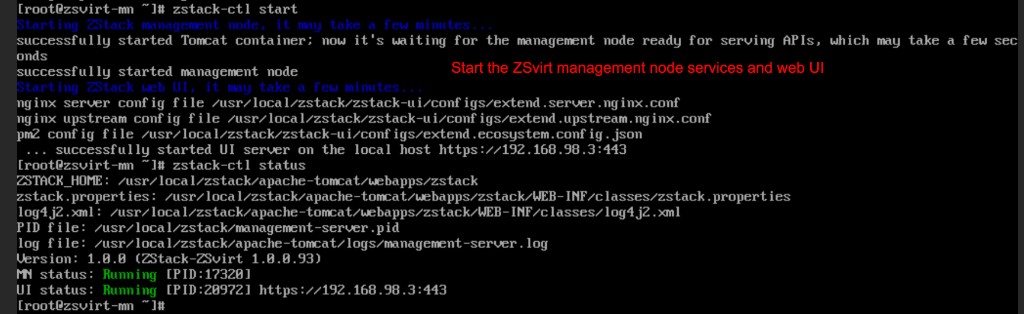
ip addrOnce you have the management node IP, write it into the ZSvirt configuration and start the services:
zstack-ctl change_ip --ip <management-node-ip>
zstack-ctl start
Replace <management-node-ip> with the address DHCP assigned to this VM.

If the management network has no DHCP
If DHCP is not available, create a bond on the management NIC and assign a static IP.
Create bond0:
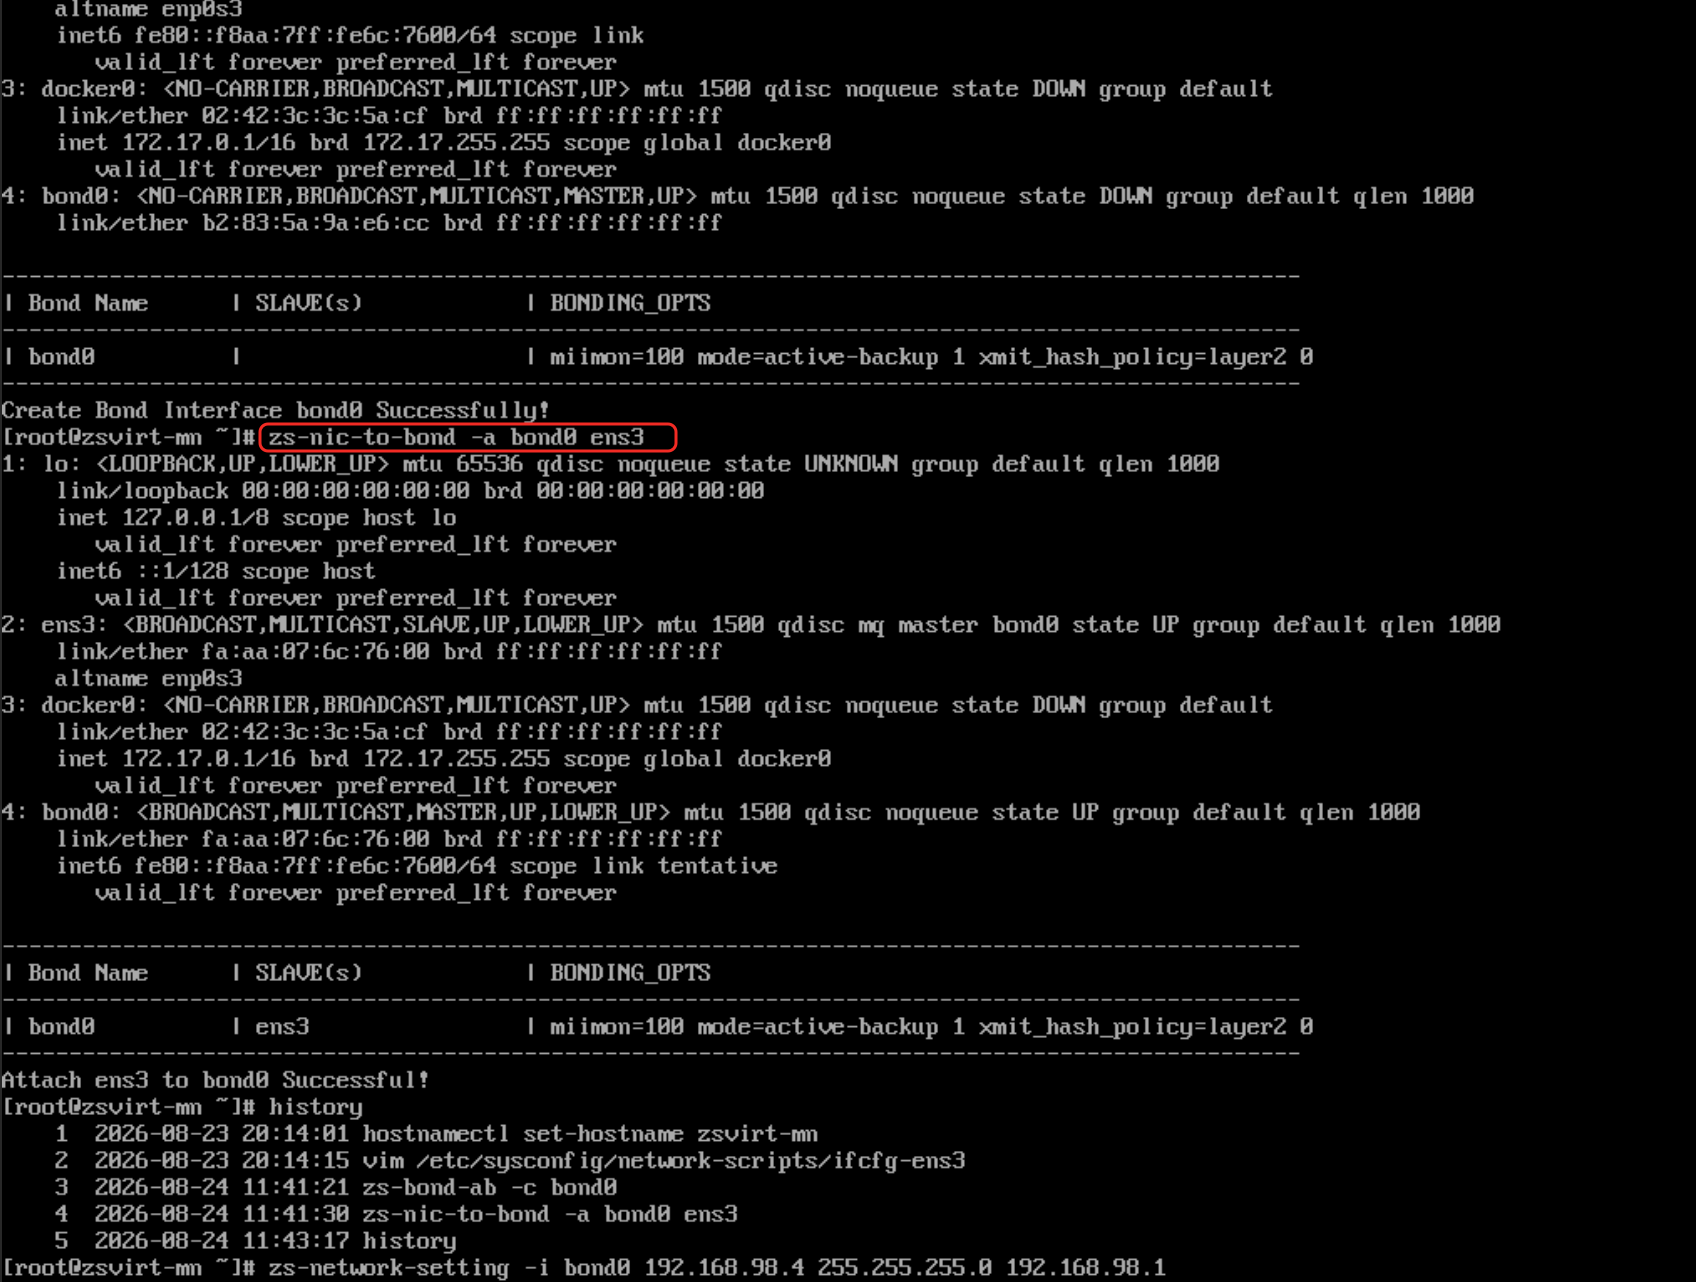
zs-bond-ab -c bond0Add the management NIC to bond0:
zs-nic-to-bond -a bond0Assign a static address to bond0:
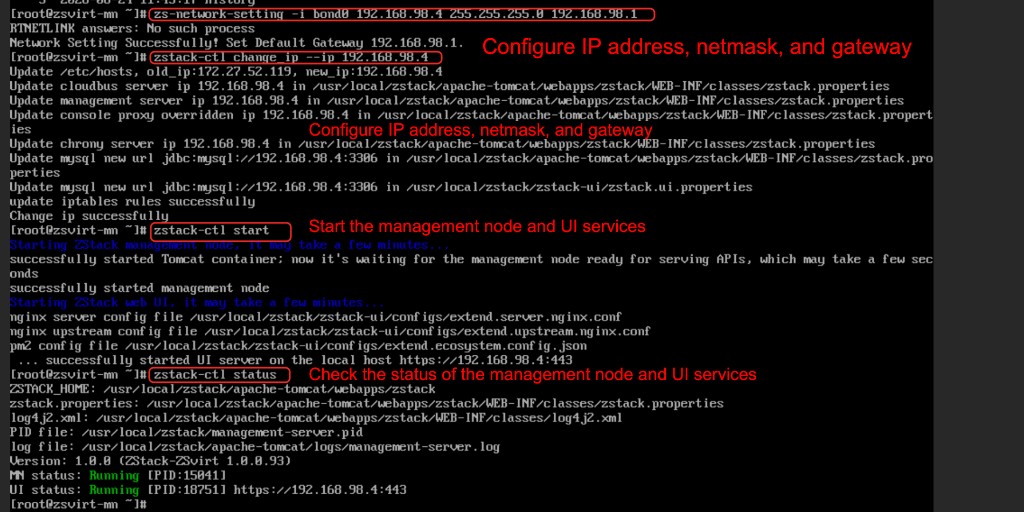
zs-network-setting -i bond0 <management-node-ip> <netmask> <gateway>Replace the placeholders with the values from your network plan.
After networking is in place, write the management node IP into the ZSvirt configuration and start the services:
Note
If you skip the next two commands, this node can be used directly as a compute node.
zstack-ctl change_ip --ip <management-node-ip>
zstack-ctl start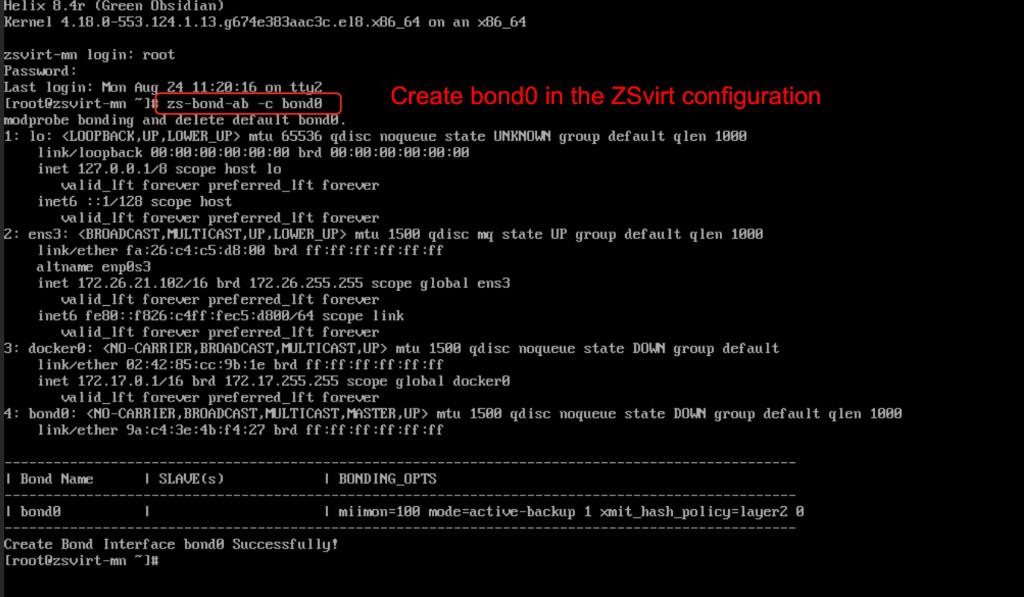
5. Open the ZSvirt UI
After the services are up, open the management node in a browser:
https://<management-node-ip>Replace <management-node-ip> with the address you configured in step 4. Follow the on-screen wizard to finish platform initialization.
Troubleshooting
If the UI does not load, work through these checks:
- Confirm the VM is running and the management NIC is on the right network.
- Confirm the management node IP, netmask, and gateway are correct.
- Confirm you ran
zstack-ctl change_ip --ip <management-node-ip>. - Confirm you ran
zstack-ctl startand waited for the services to come up. - Confirm you can reach the management node IP from your workstation or another host on the same subnet.