
Single NIC Deployment
The operating system installation process is identical for both x86 and ARM servers. This chapter uses x86 servers to introduce the detailed installation procedure.
Procedure
-
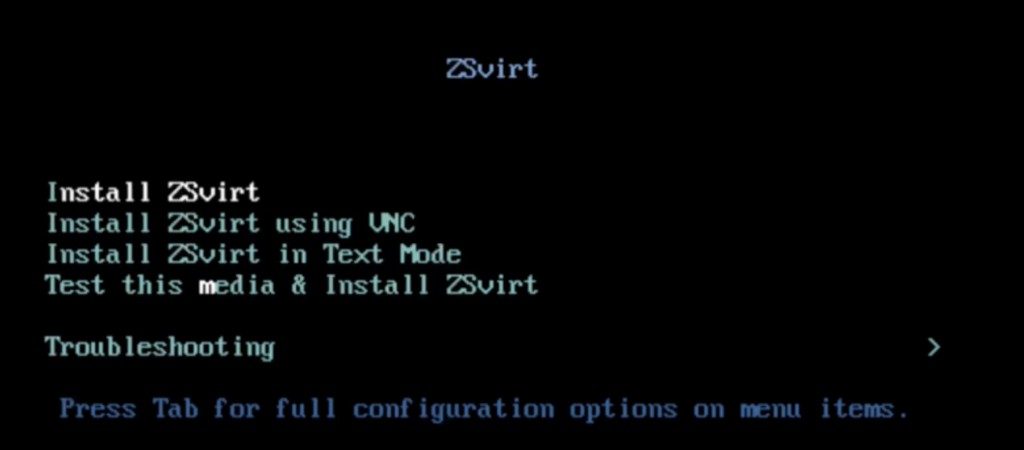
Select the boot option.
Enter the ISO boot interface and choose the default option to start the operating system installation. You can select based on your actual situation, but we recommend using the graphical user interface (GUI) for installation. If the server does not have a VGA port and only supports serial connections, you can use either VNC or text mode installation methods.
- GUI method
- VNC method
- Text mode method
-
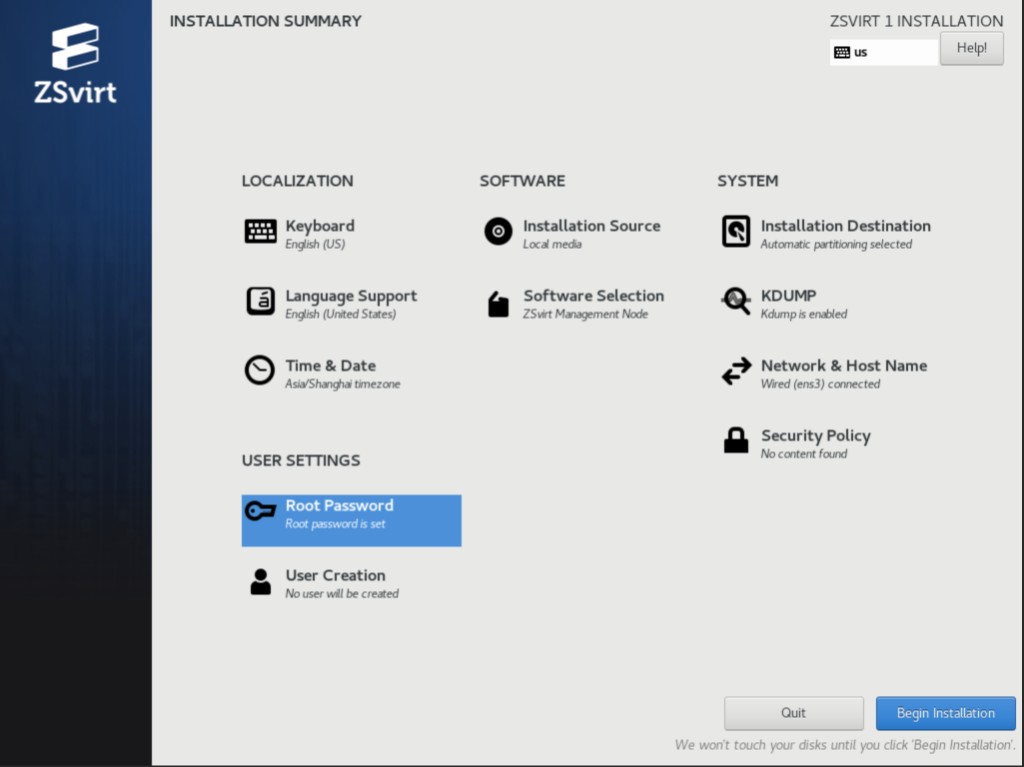
Review the installation configuration summary.
This page displays the system installation configuration. You can modify the configuration as needed. By default, ZSvirt is configured with the following settings:
- Keyboard: English (US)
- Language Support: English (United States)
- Time & Date: Asia/Shanghai (UTC+8). We recommend that you check the host's time in advance and configure it to the current time and time zone.
-
Select the installation mode.
-
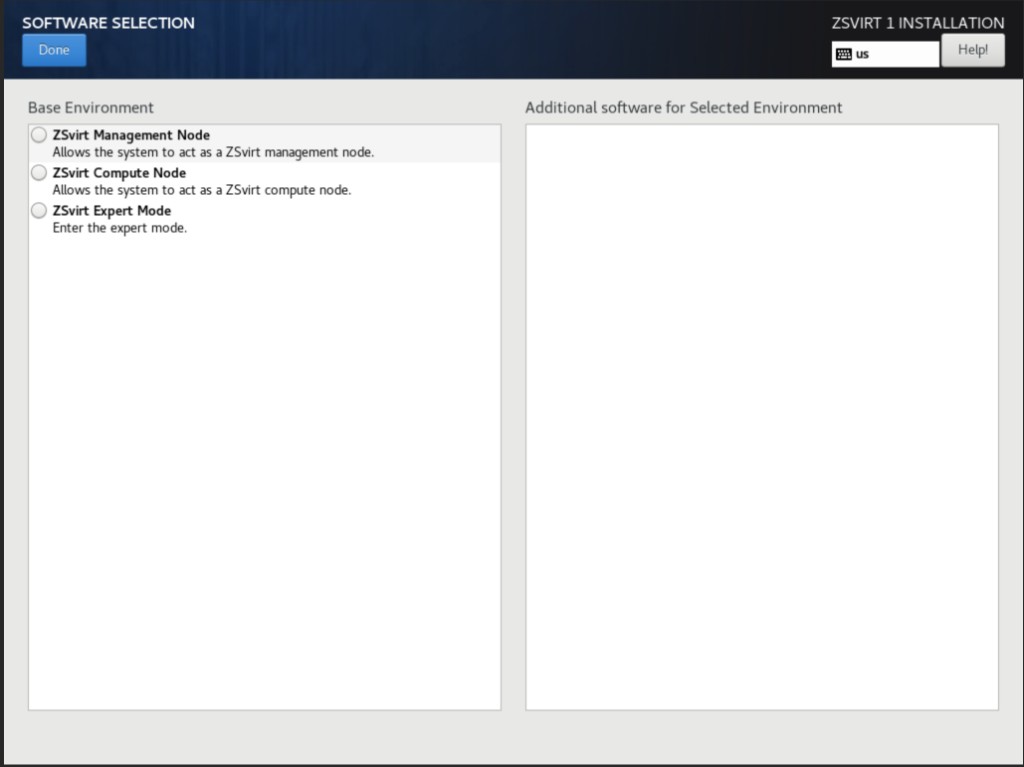
On the INSTALLATION SUMMARY page, click Software Selection.
-
On the SOFTWARE SELECTION page, choose the installation mode.
Set the servers for management nodes to ZSvirt Management Node mode. Set the other servers to ZSvirt Compute Node mode.
-
After selecting the installation mode, click Done.
-
-
Configure the disk partitions.
-
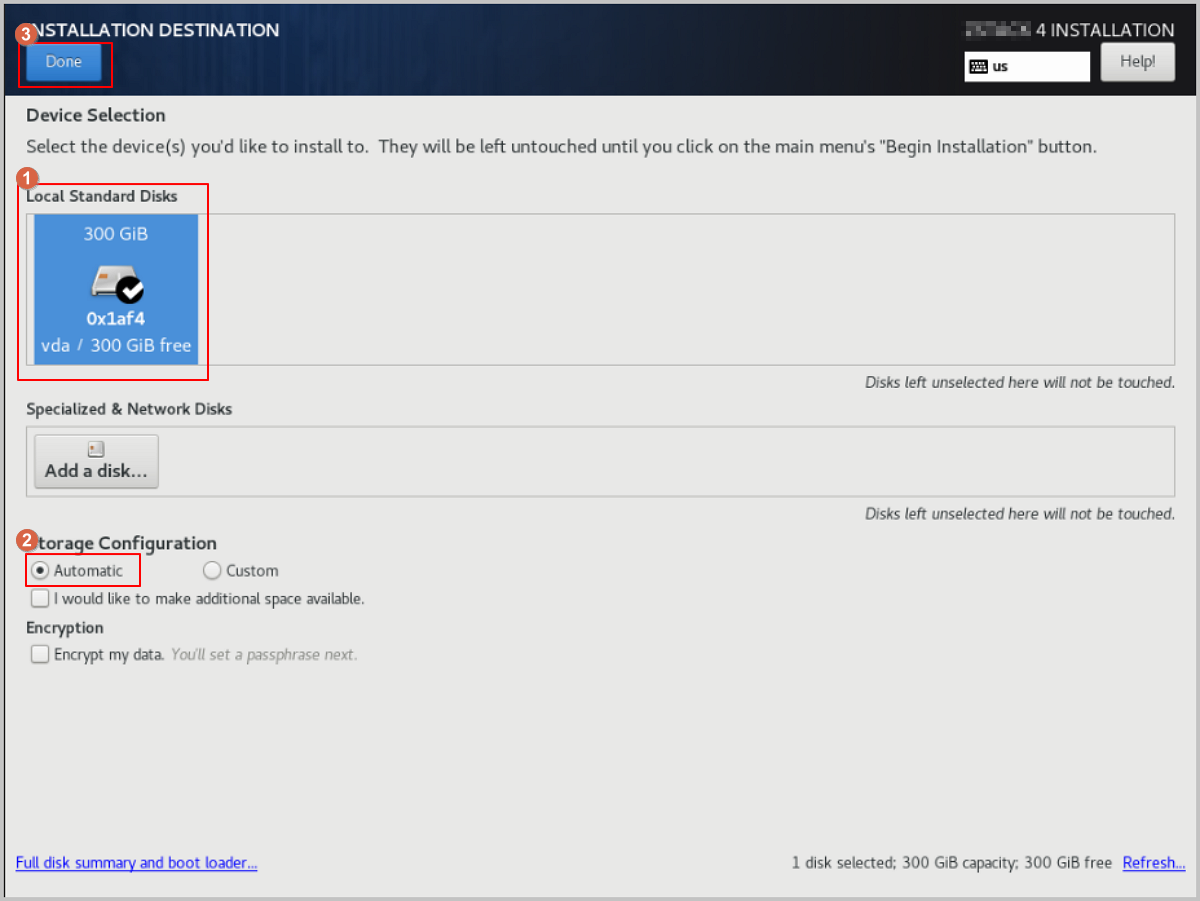
On the INSTALLATION SUMMARY page, click Installation Destination to enter the INSTALLATION DESTINATION page.
-
For Device Selection, we recommend that you only configure the system disk. After the system is installed, you can configure other disks.
-
For Storage Configuration, we recommend selecting Automatic to automatically configure the disk partitions.
If you need to manually configure disk partitions, refer to the following guidelines based on the BIOS boot mode:
- UEFI Mode:
/boot: This directory stores the core files needed for Linux boot. We recommend allocating 1 GB of space./boot/efi: This directory stores the UEFI boot files. We recommend allocating 500 MB.swap: This is the swap area. We recommend allocating 32 GB./: This is the root directory for the Linux system. We recommend allocating all remaining space.
- Legacy Mode:
/boot: This directory stores the core files needed for Linux boot. We recommend allocating 1 GB of space.swap: This is the swap area. We recommend allocating 32 GB./: This is the root directory for the Linux system. We recommend allocating all remaining space.
- The above values represent the recommended partition sizes for ZSvirt (total disk capacity should be greater than 300 GB).
- In Legacy mode, if the system disk capacity exceeds 2 TB, you need to configure a BIOS boot partition to support GPT partitioning. UEFI mode does not have this limitation and supports GPT partitioning.
- UEFI Mode:
-
Review the configuration and click Done.
-
-
Start configuring the NIC.
-
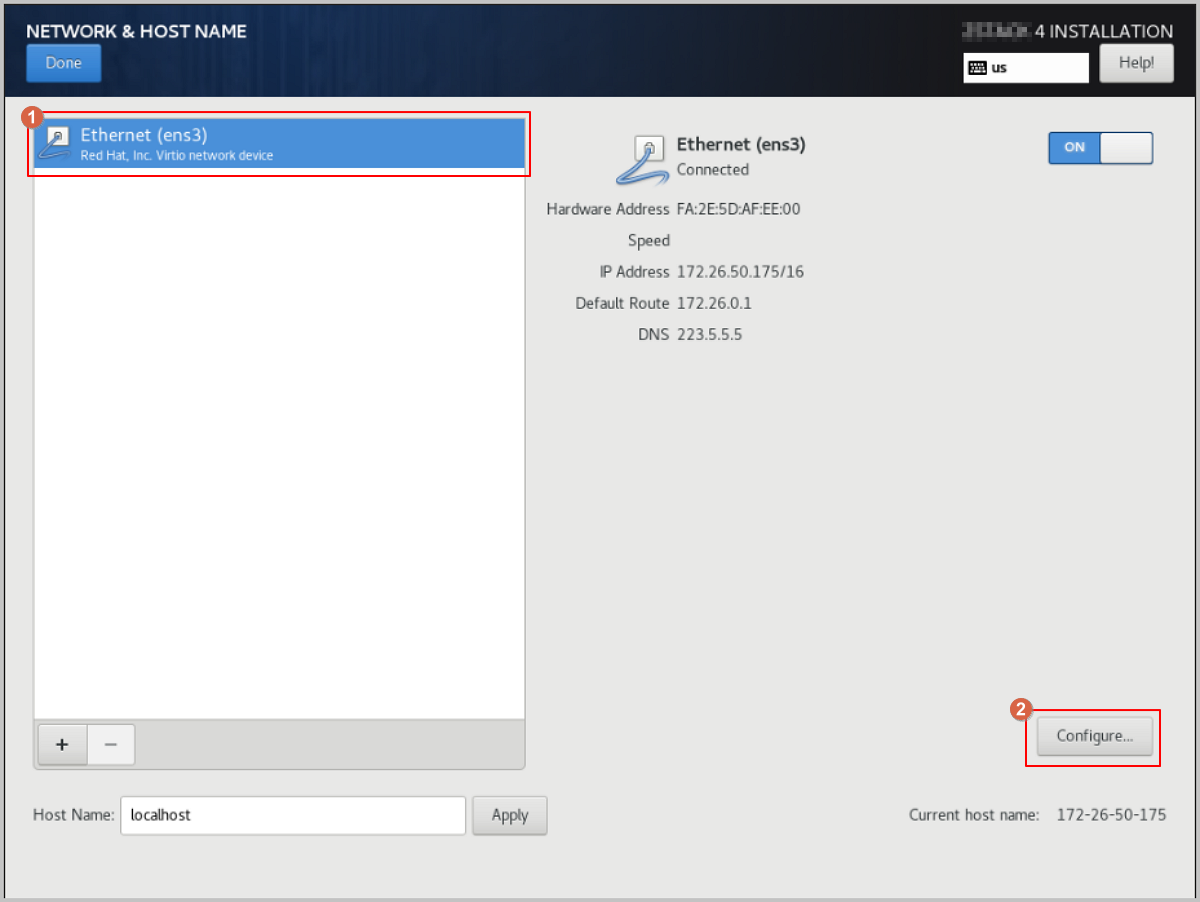
On the INSTALLATION SUMMARY page, click Network & Host Name to access the NETWORK & HOST NAME page.
-
Select a NIC from the list on the left, such as Ethernet (ens3).
-
Click Configure.
-
-
Configure a static IP address for the NIC.
-
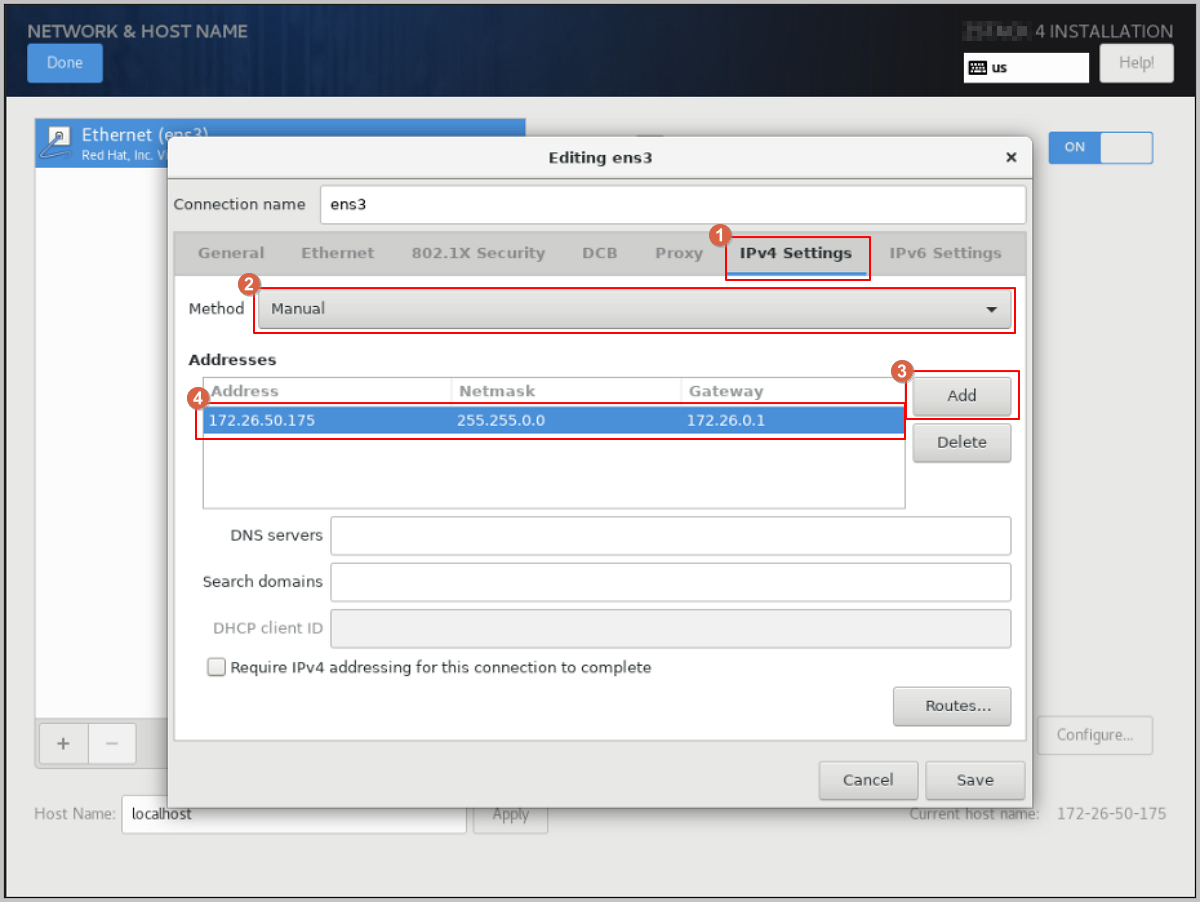
In the Editing ens3 dialog, click IPv4 Settings.
-
For Method, choose the IP address acquisition method as needed. For example, select Manual to specify the IP address manually.
-
Click Add to add an IP address entry, and configure the IP address, netmask, and gateway as needed.
-
-
Configure the NIC to activate automatically.
-
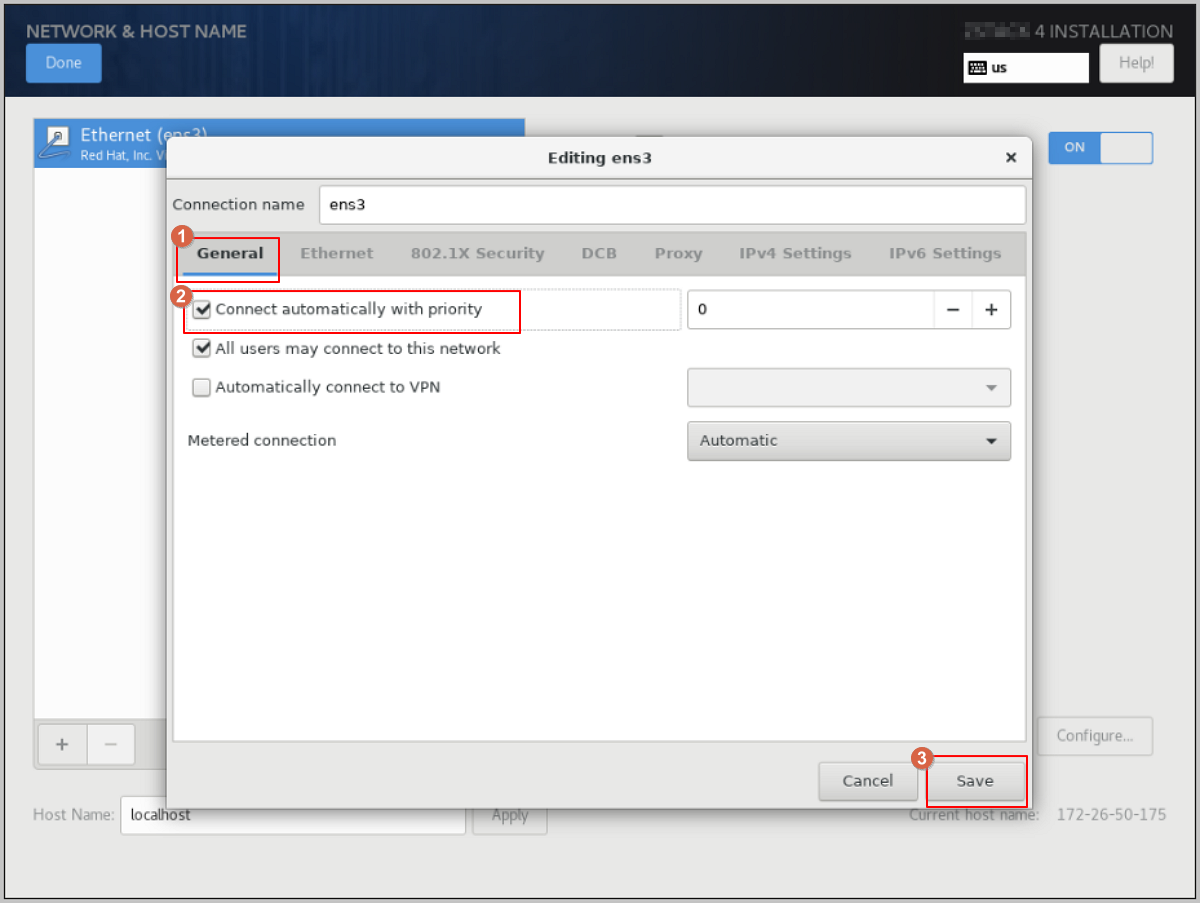
In the Editing ens3 dialog, click General, then select the Connect automatically with priority checkbox to set the NIC for automatic activation.
-
Review the configuration and click Save.
-
-
Complete the NIC configuration.
-
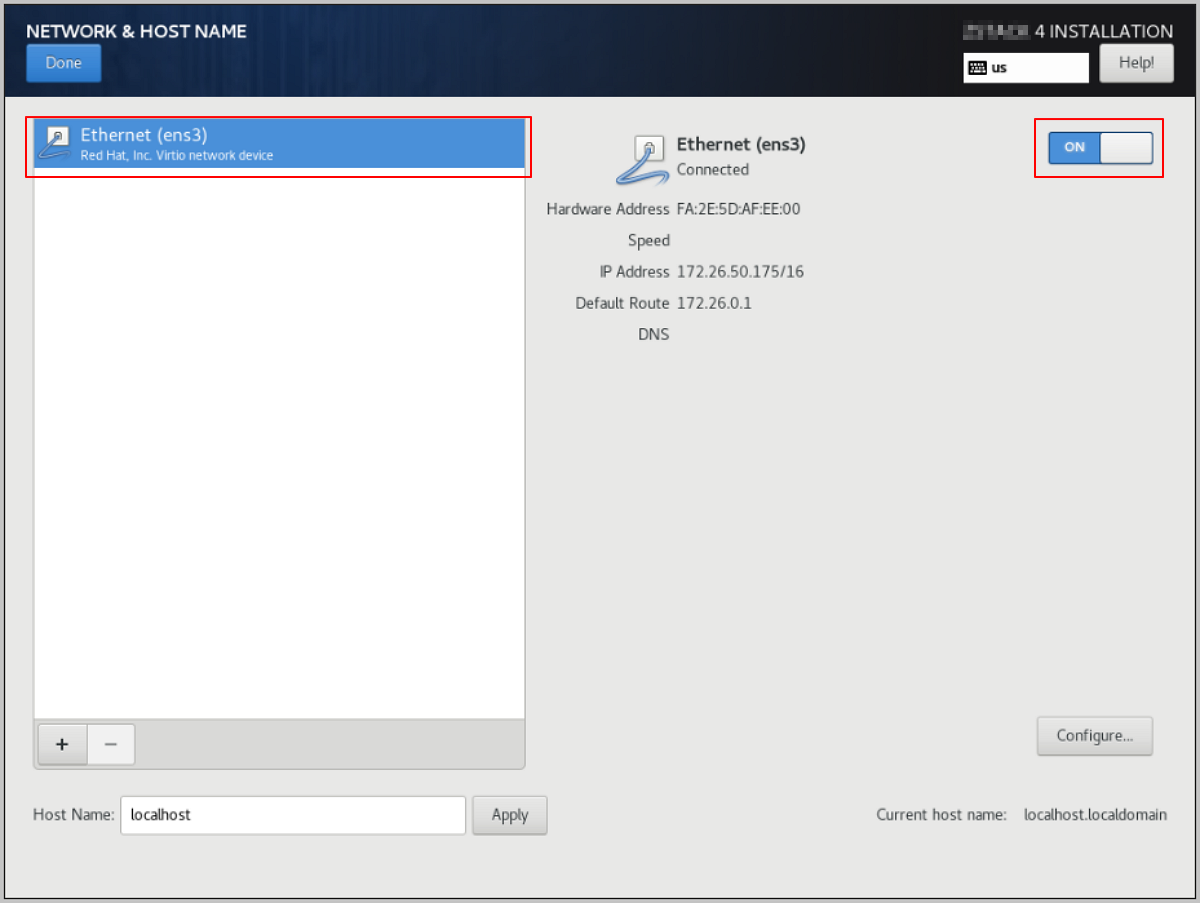
Return to the NETWORK & HOST NAME page, and confirm that you have selected the correct NIC and that the NIC status is ON.
-
Click Done to return the INSTALLATION SUMMARY page.
-
-
On the INSTALLATION SUMMARY page, click Root Password to set the root password for the operating system.
-
On the INSTALLATION SUMMARY page, click Begin Installation to begin installing the operating system.