
Install Through TUI
This chapter describes the complete procedure for deploying a Compute Node from an ISO, configuring the management network as a bond in the TUI, and installing the management node on that compute node.
Procedure
-
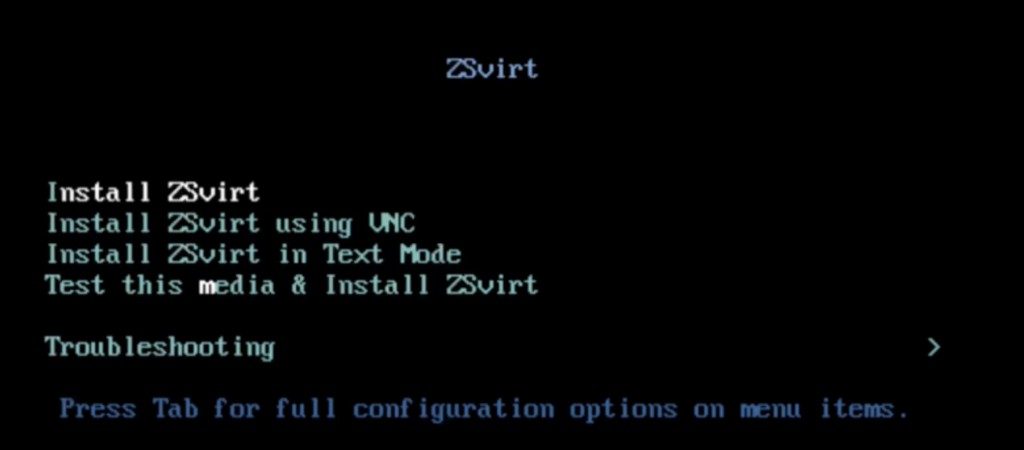
Select the boot option.
Enter the ISO boot interface and choose the default option to start the operating system installation. You can select based on your actual situation, but we recommend using the graphical user interface (GUI) for installation. If the server does not have a VGA port and only supports serial connections, you can use either VNC or text mode installation methods.
- GUI method
- VNC method
- Text mode method
-
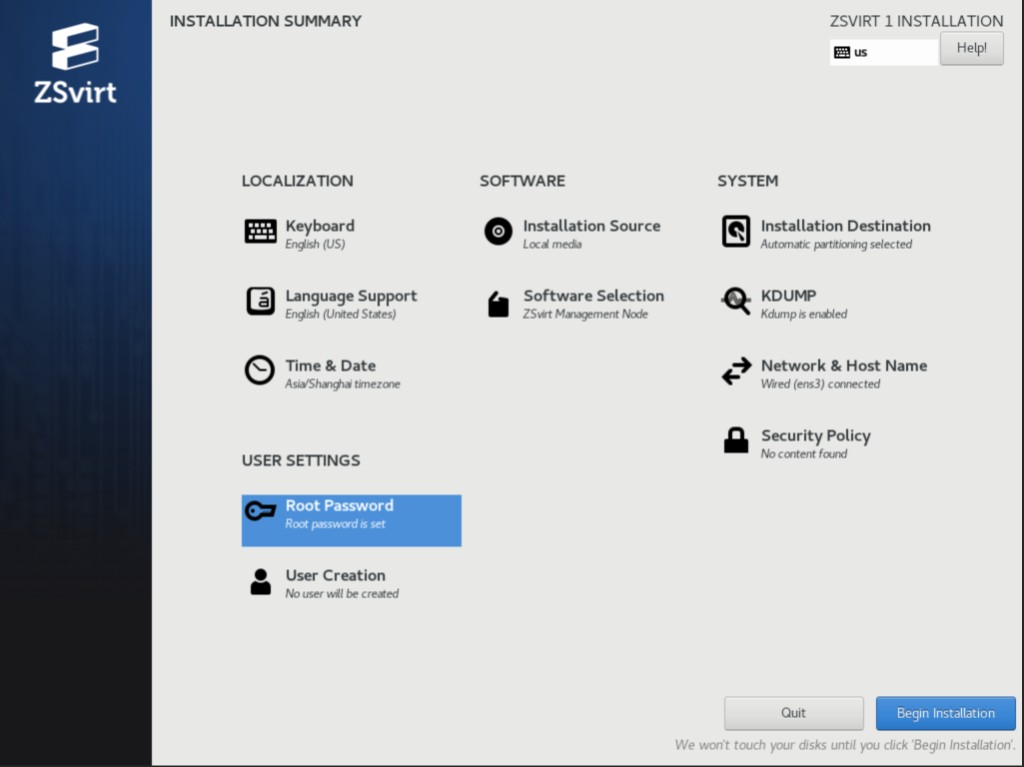
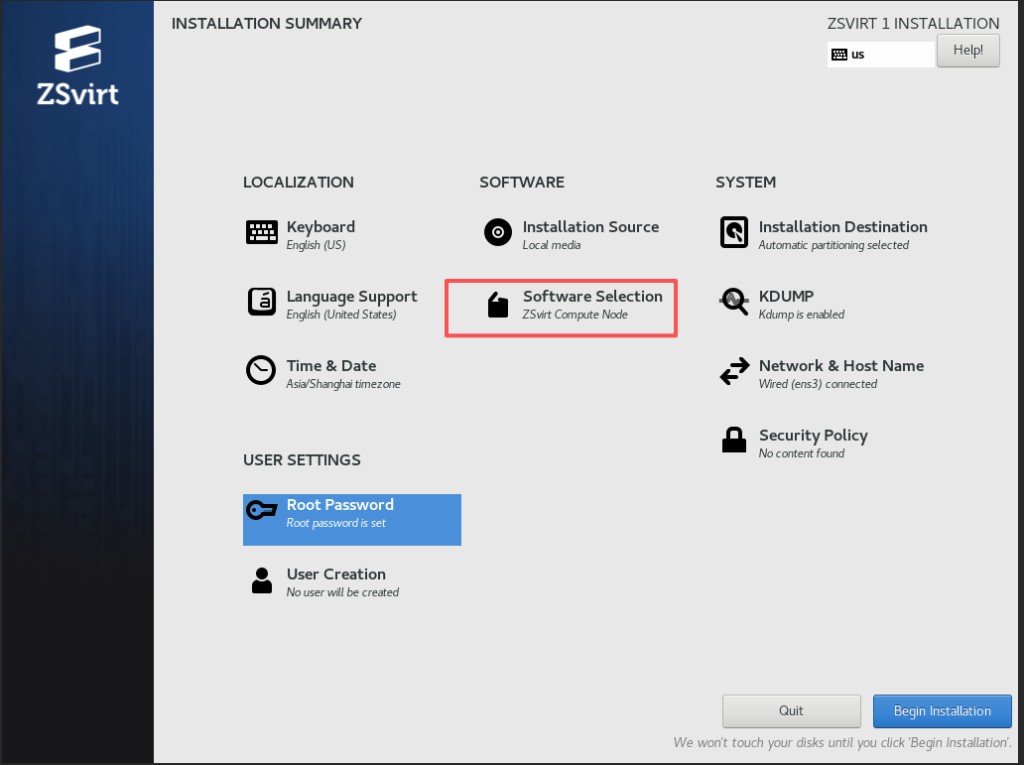
Enter the INSTALLATION SUMMARY wizard.
After the installation boot screen loads automatically, the INSTALLATION SUMMARY page appears. On this page, focus on the following three configuration items: Installation Destination, Software Selection, and Root Password.
-
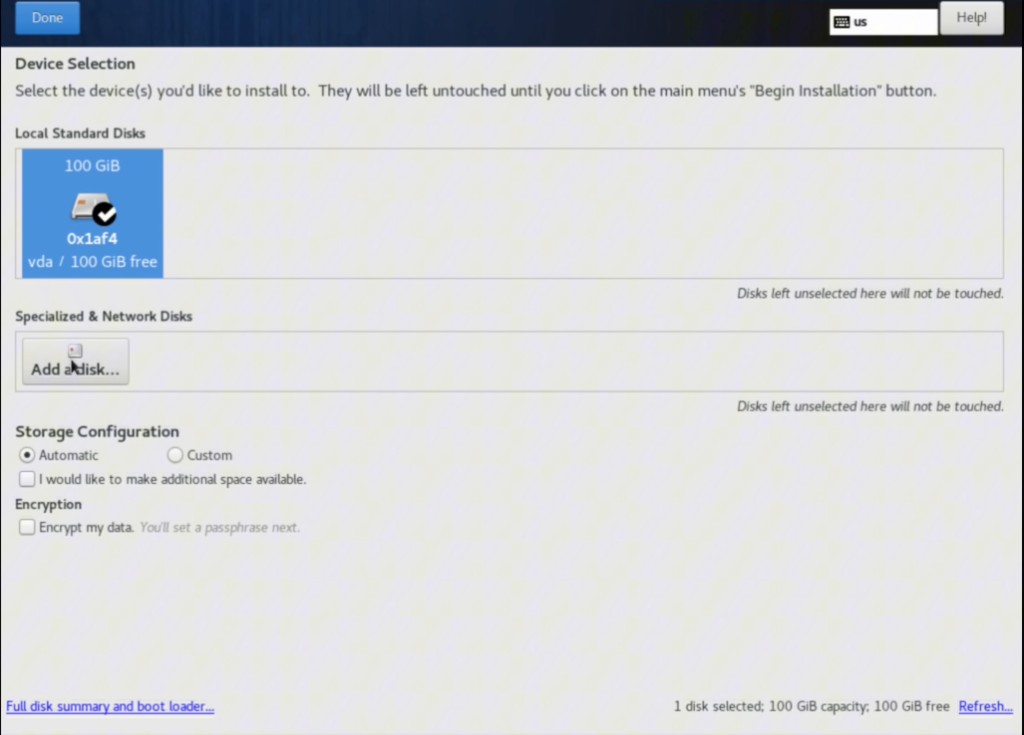
Configure Installation Destination.
-
Click Installation Destination.
-
Under Local Standard Disks, select a disk to use as the system disk.
-
Keep Storage Configuration set to the default Automatic.
-
Click Done in the upper-left corner to return.
-
-
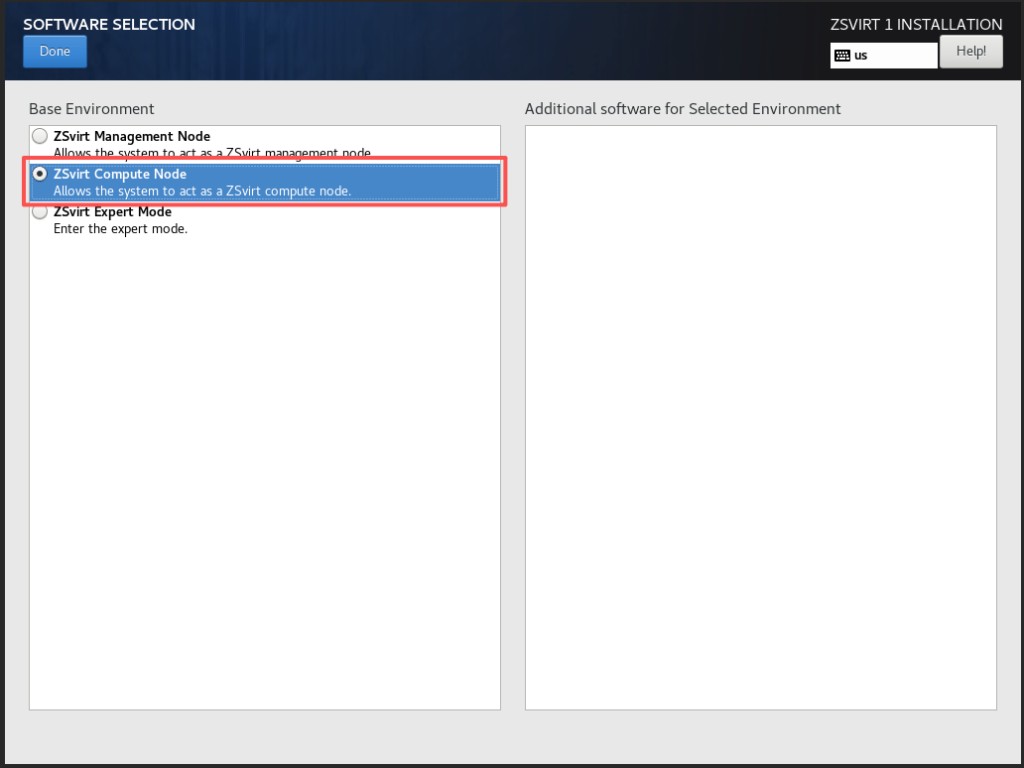
Configure Software Selection.
-
Click Software Selection.
-
Under Base Environment, select ZSvirt Compute Node for the compute node mode.
-
Click Done in the upper-left corner to return.
-
-
Configure the Root Password.
-
Click Root Password.
-
Enter and confirm the root password.
The password must meet the strength requirements indicated by the prompt.
-
Click Done to return.
-
-
Start the installation and wait for it to finish.
Verify that all items marked with red boxes are configured (no yellow warning bars remain), and click Begin Installation in the lower-right corner to start the installation.
The installation completes automatically and requires no manual intervention. After the installation finishes, the system reboots and the TUI appears.
-
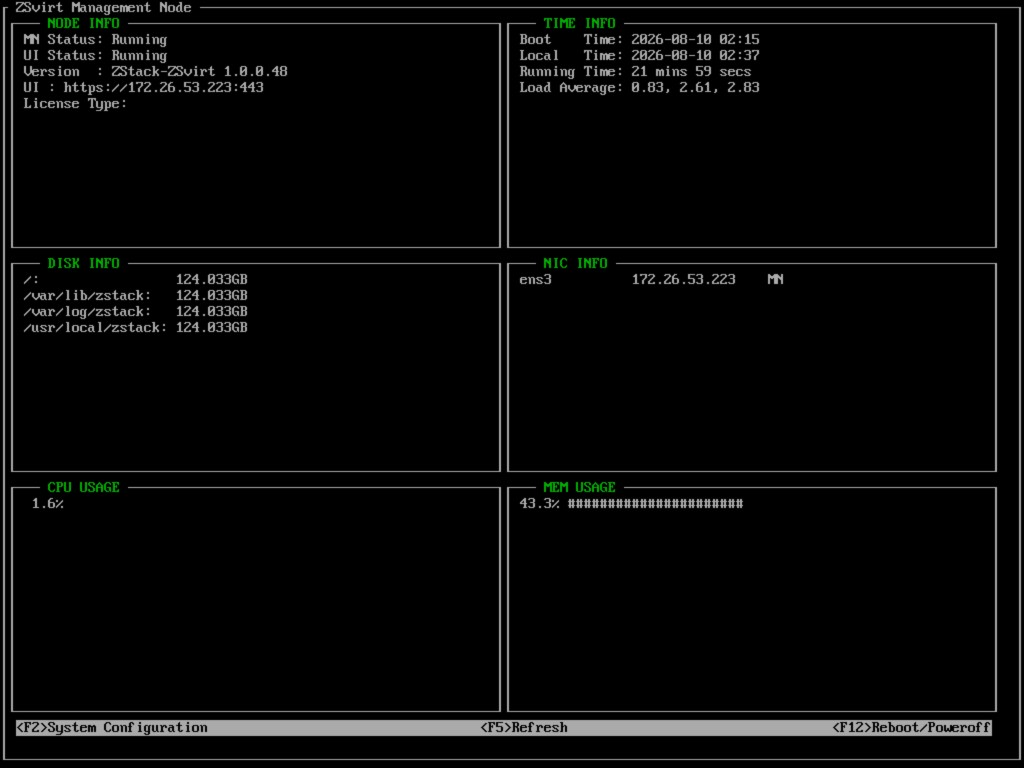
Enter the TUI main screen and complete root authentication.
The TUI is divided into four information areas:
-
NODE INFO: Node uptime, load, CPU, and memory usage.
-
DISK INFO: Disk mount points and capacity.
-
NIC INFO: NIC names and IP addresses. The default NIC, such as ens3, is displayed at first boot.
-
VM INFO: List of virtual machines on the current node. The shortcut keys are shown at the bottom of the screen:
-
<F2> System Configuration: Enter system configuration.
-
<F12> Reboot/Poweroff: Reboot or shut down the system.
-
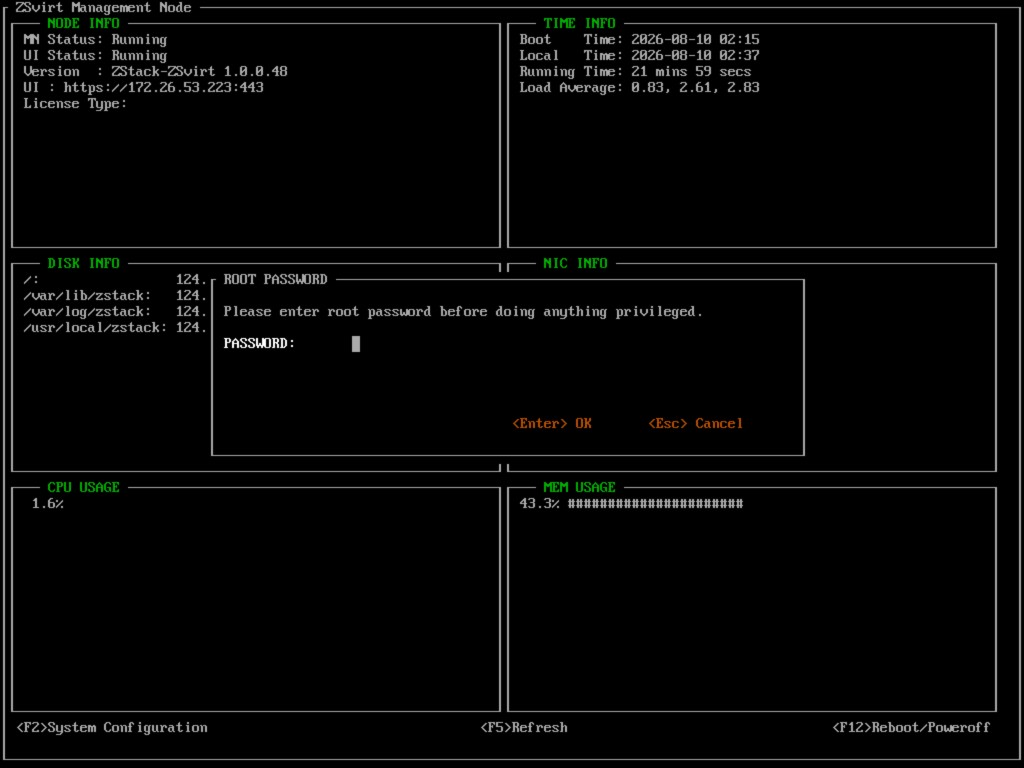
Press F2 to enter system configuration. The ROOT PASSWORD authentication dialog box appears.
-
Enter the root password and press Enter to confirm.
-
-
Open the Configure Networks settings.
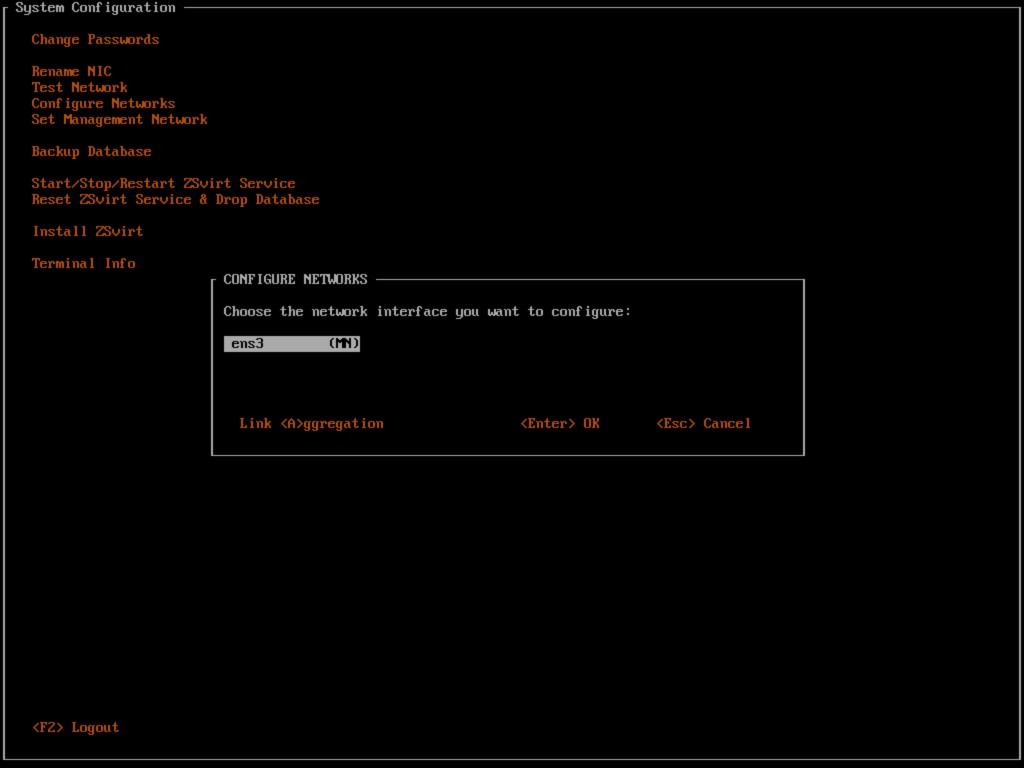
After authentication, the System Configuration menu appears.
-
Use the arrow keys to select Configure Networks, and then press Enter.
-
In the CONFIGURE NETWORKS dialog box that appears, select the physical NIC to configure (for example, ens3).
-
Switch the keyboard to uppercase.
-
Press the A key to trigger the Link <A>ggregation operation.
Make sure the keyboard is in uppercase mode. Otherwise, pressing A will not start the bond creation process.
-
-
Select the bond mode.
-
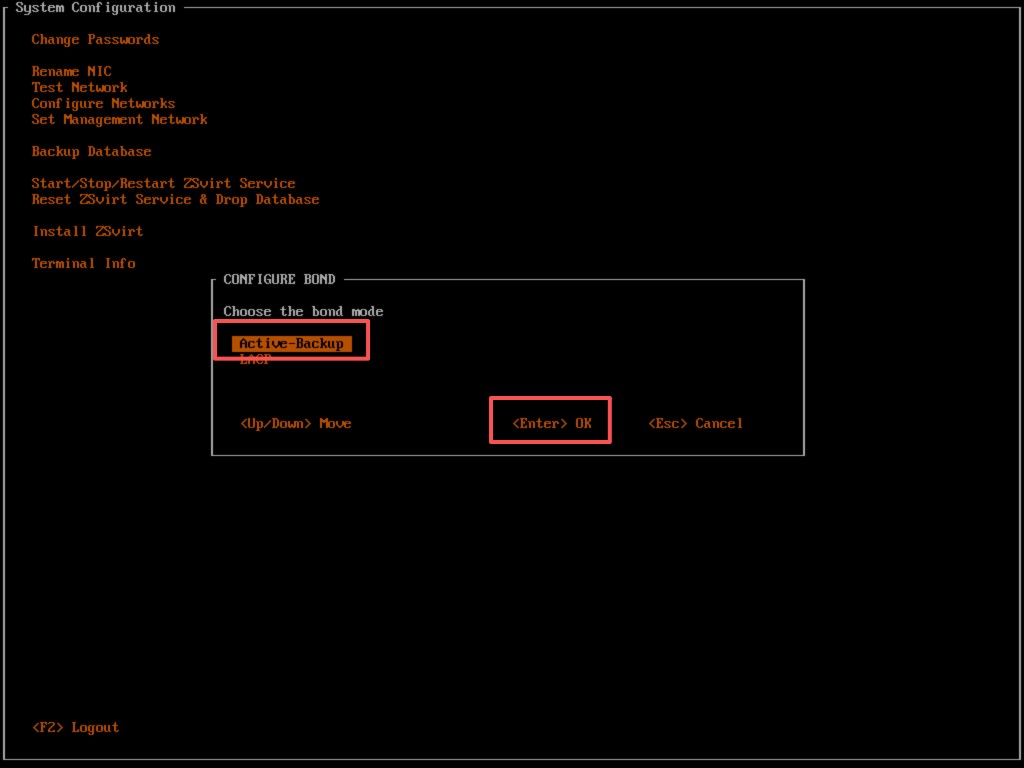
In the CONFIGURE BOND dialog box that appears, select a bond mode.
-
This chapter uses Active-Backup as an example. Press Enter to confirm.
-
-
Name the bond and select slave NICs.
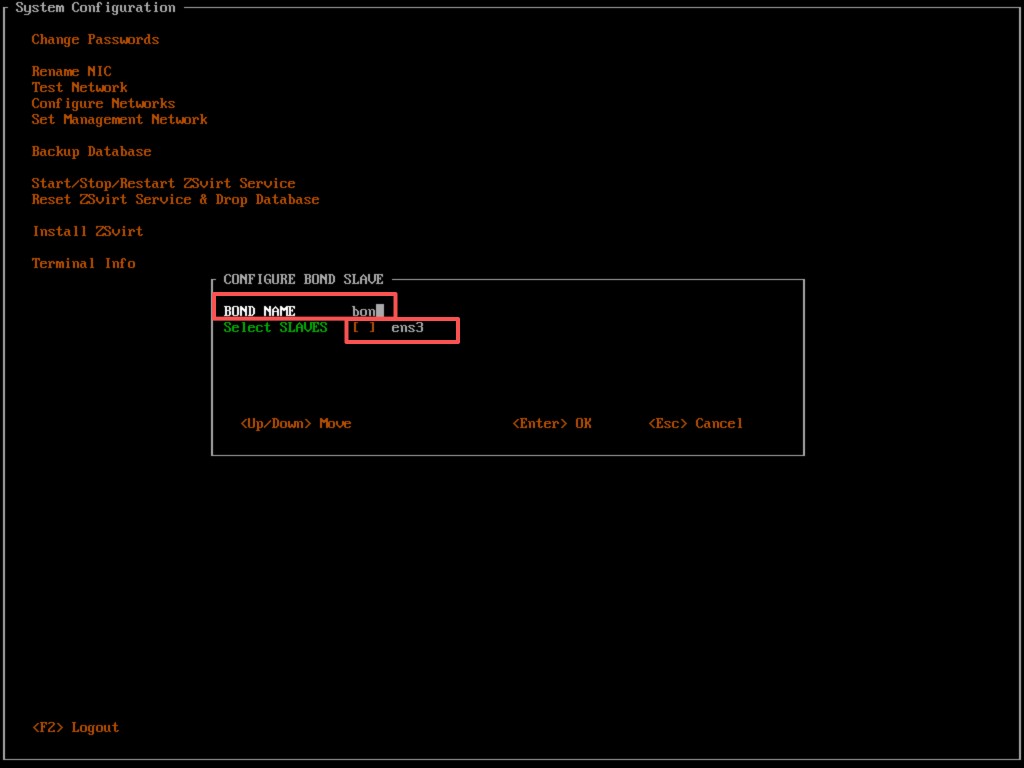
The CONFIGURE BOND SLAVE dialog box appears. Configure the following settings.
-
In BOND NAME, enter a name for the bond, for example, bond0.
-
In Select SLAVES, use the arrow keys to navigate to the target NIC and press Space to select it.
A selected NIC is marked with
[X]. -
After selecting all required NICs, press Enter to confirm.
-
-
Confirm the bond configuration.
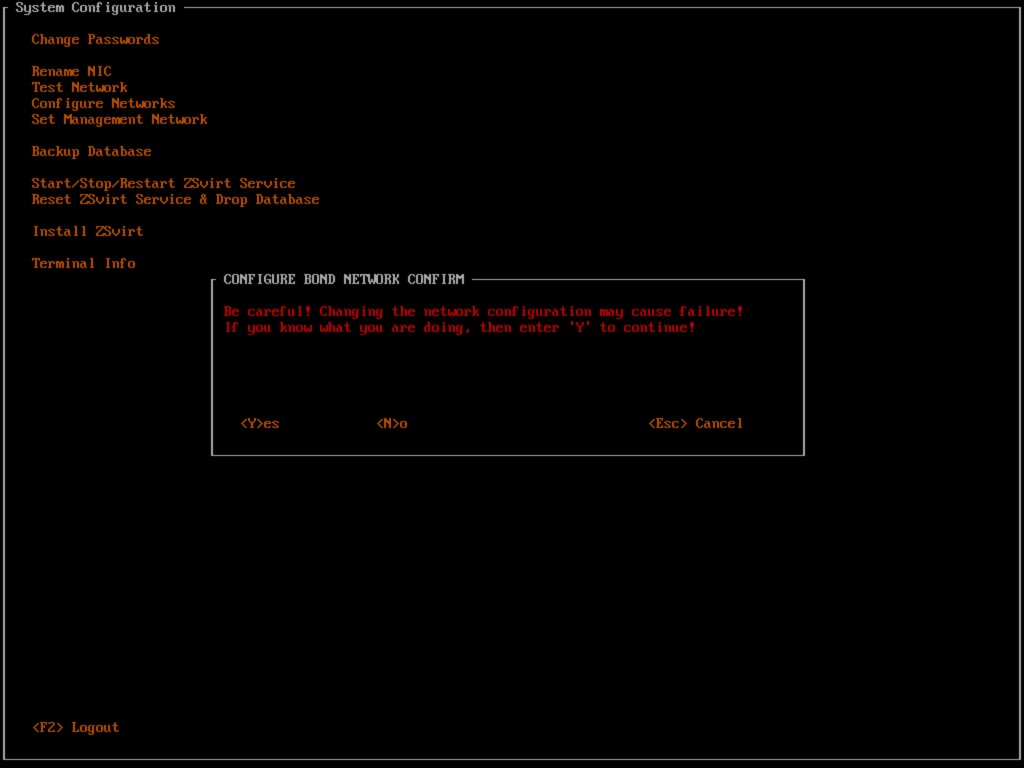
The CONFIGURE BOND NETWORK CONFIRM warning dialog box appears with the following message:
Be careful! Changing the network configuration may cause failure! If you know what you are doing, then enter 'Y' to continue!-
Switch the keyboard to uppercase.
-
Press the Y key to confirm the configuration.
-
When the operation is successful, the SUCCESS dialog box appears with the message
Network configuration is changed successfully!. Press Enter to close it.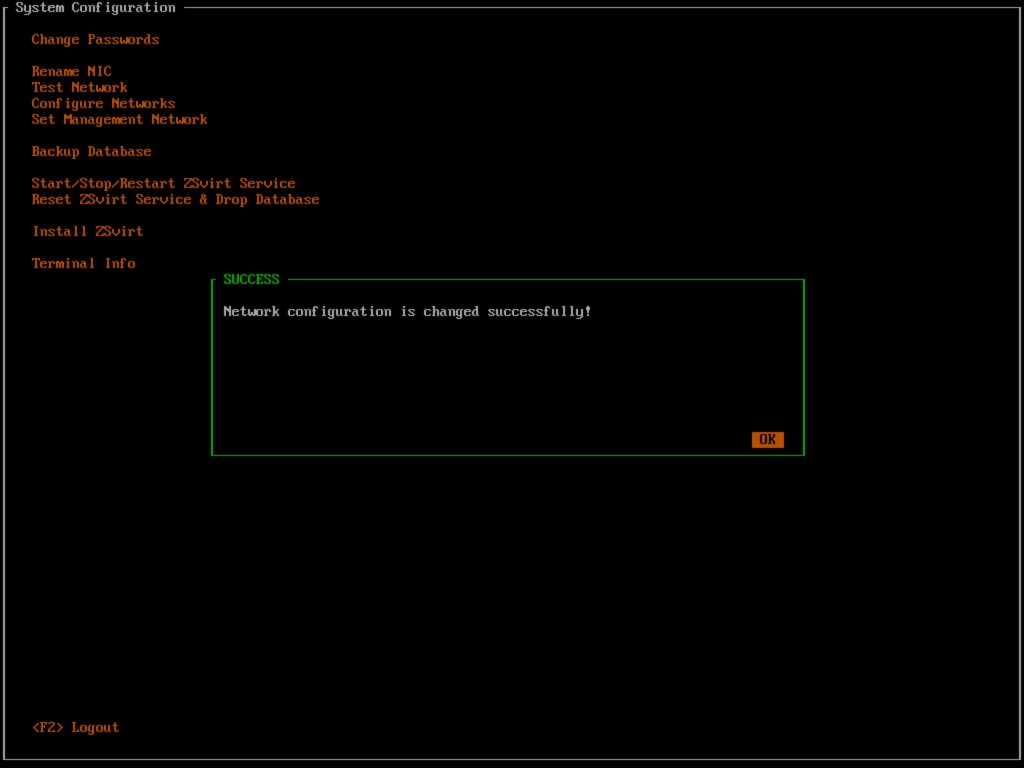
-
-
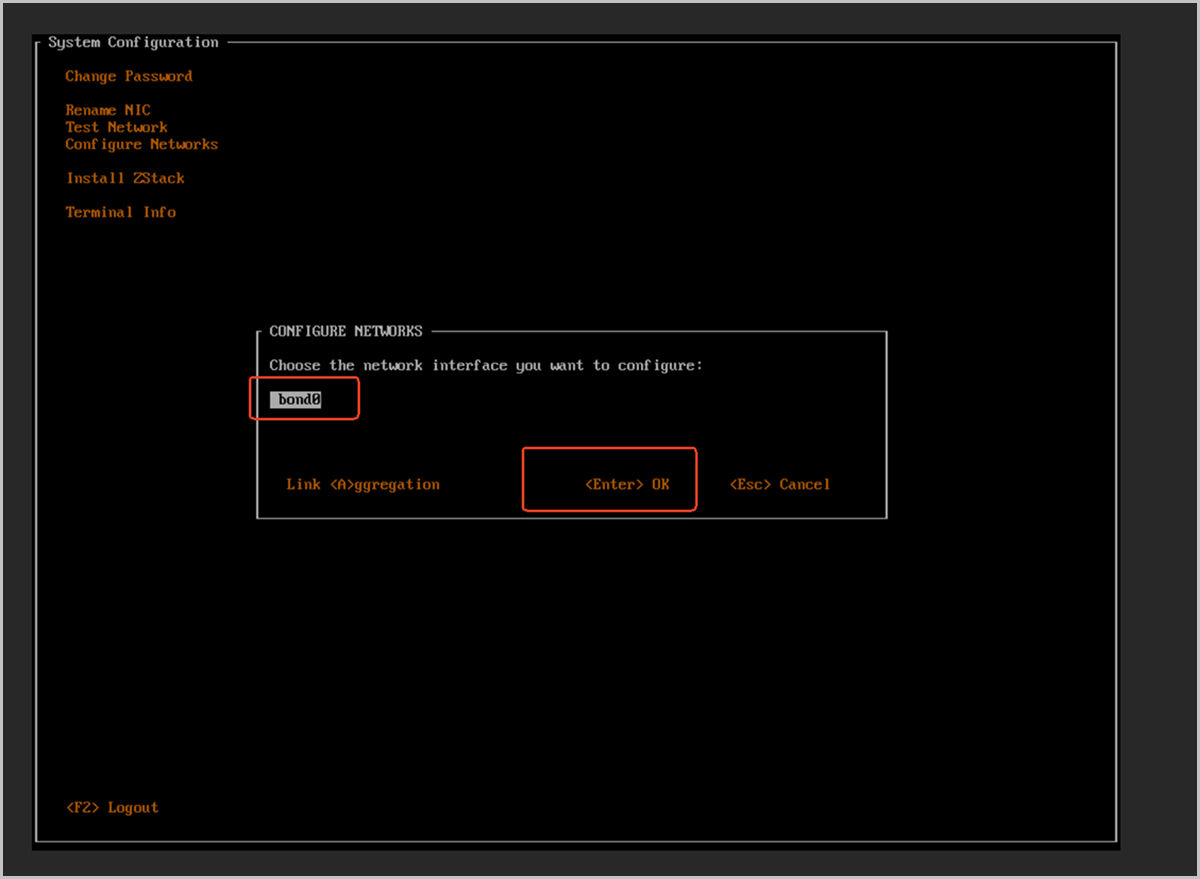
Select the bond to configure its IP.
You return to the Configure Networks dialog box.
-
In the NIC list, select the bond created in the previous step (for example, bond0).
-
Press Enter to enter the IP configuration.
-
-
Configure the management network IP address.
-
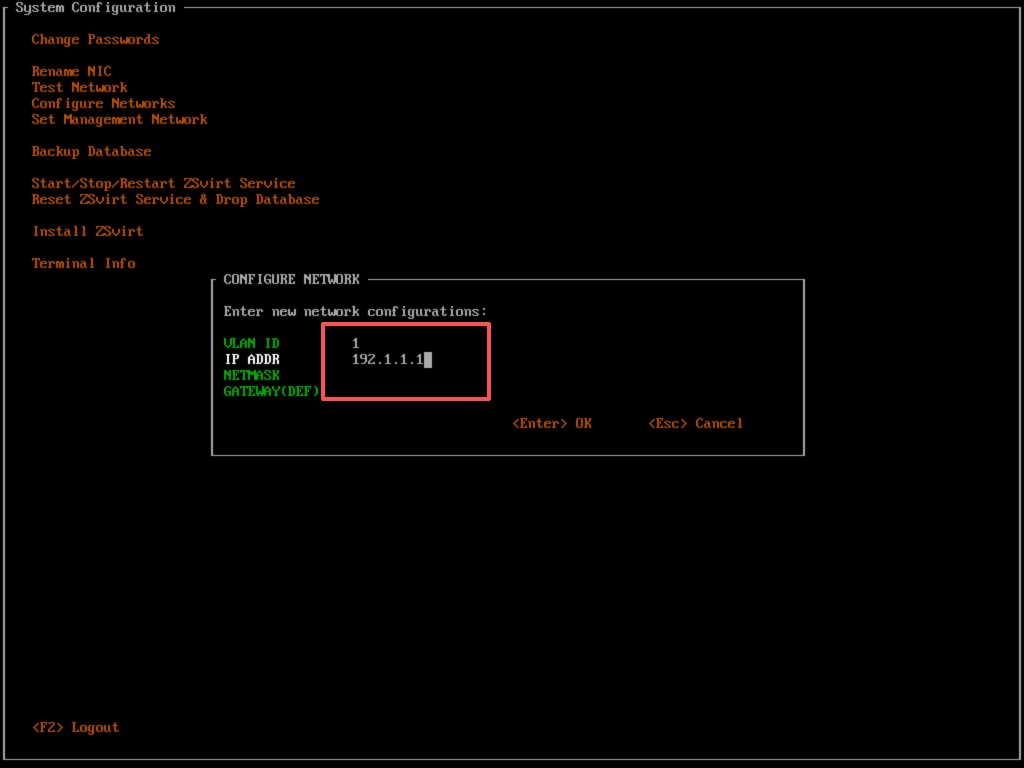
In the CONFIGURE NETWORK dialog box, enter the following fields as shown in the example:
- VLAN ID: Enter the VLAN ID of the management network. Leave it empty if no VLAN is used.
- IP ADDR: Enter the management network IP address, for example, 172.26.215.195.
- NETMASK: Enter the subnet mask, for example, 255.255.0.0.
- GATEWAY(DEF): Enter the default gateway, for example, 172.26.0.1.
-
Press Enter to confirm.
-
-
Confirm the IP configuration.
-
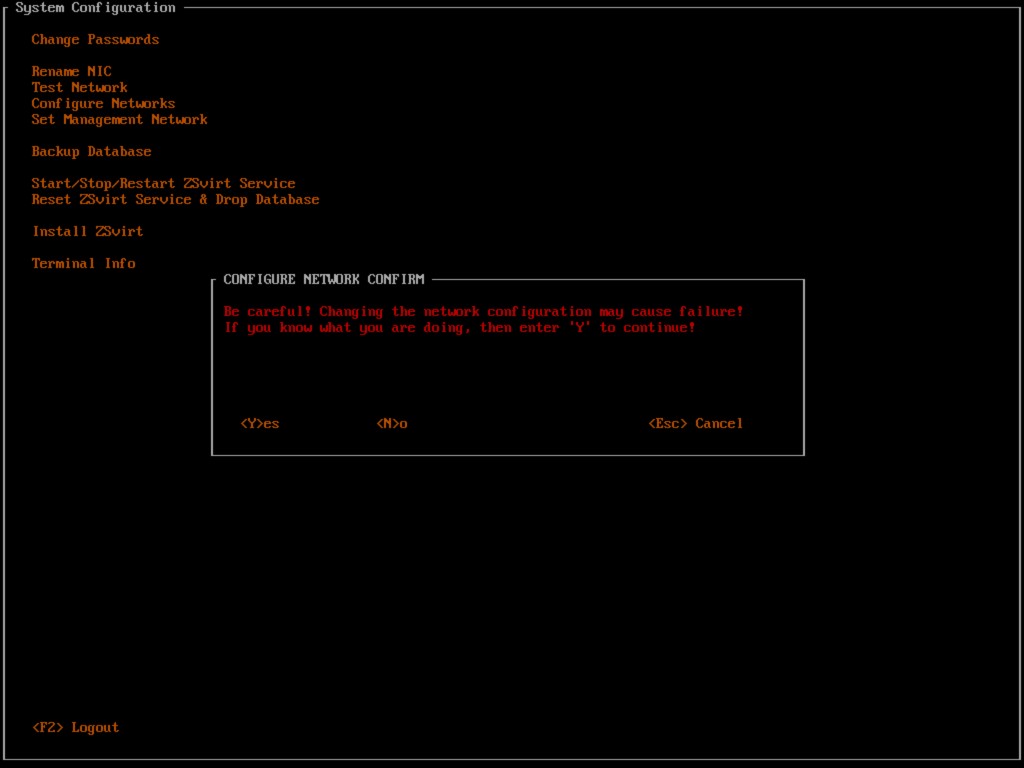
Press Enter to submit. The CONFIGURE NETWORK CONFIRM confirmation dialog box appears.
-
Switch the keyboard to uppercase.
-
Press the Y key to confirm.
-
The SUCCESS dialog box appears. Press Enter to close it.
-
-
Open the Install ZSvirt option.
-
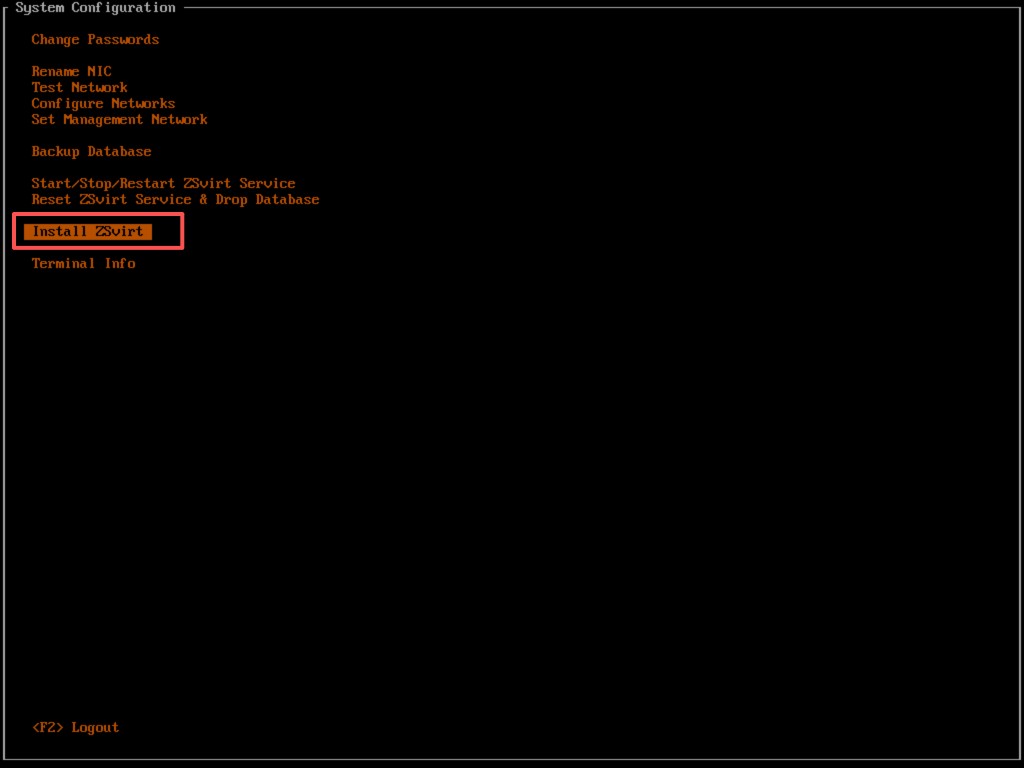
Press Esc to return to the System Configuration menu.
-
Use the arrow keys to select Install ZSvirt.
-
Press Enter.
-
-
Confirm the management node installation.
The INSTALL ZSvirt warning dialog box appears with the following message:
This process will install a brand new ZSvirt, please confirm-
Type the full string
install zstack. -
Press Enter to confirm.
-
-
Wait for the management node installation to complete.
The screen enters a waiting state and displays the message
Please wait.... Wait for the installation to complete. -
After the installation is complete, view the TUI main screen.
After the management node installation completes, the information on the TUI main screen changes as follows:
- DISK INFO: New mount points such as
/var/lib/zstackand/usr/local/zstackare added. - NIC INFO: A new
docker0interface (related to the management service) is displayed, along with the configuredbond0and its IP address (for example, 172.26.215.195).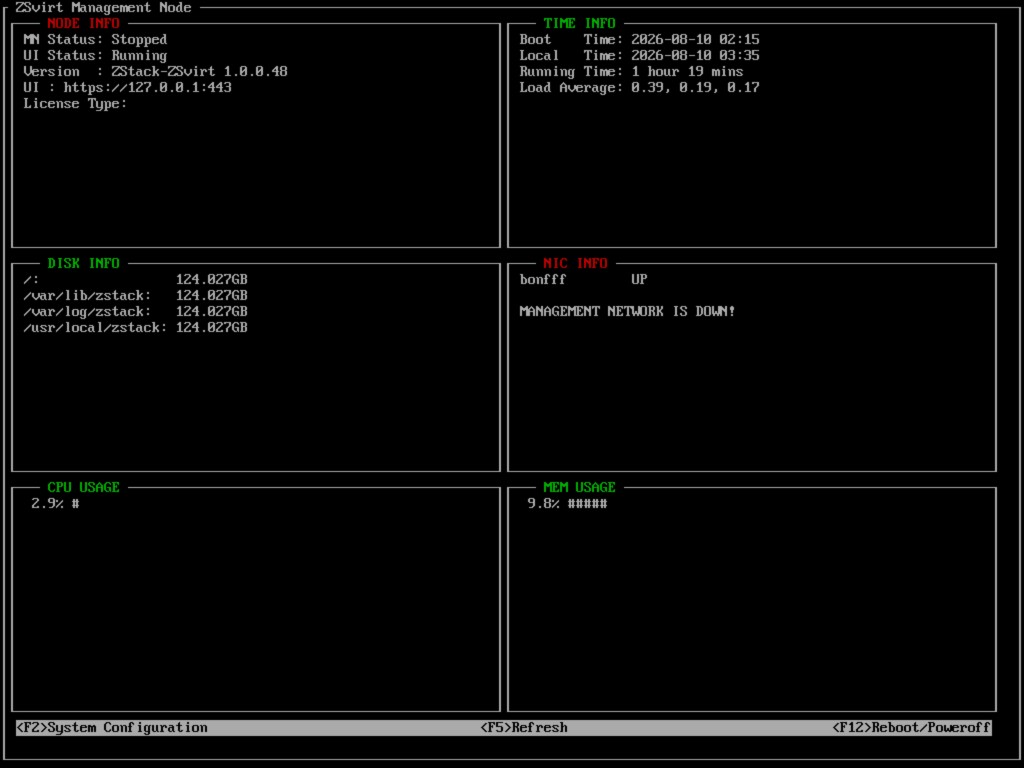
- DISK INFO: New mount points such as
-
Verify the management node status from the command line.
-
Press Ctrl + Alt + F2 to switch to the command line login screen.
-
Log in as the root user.
-
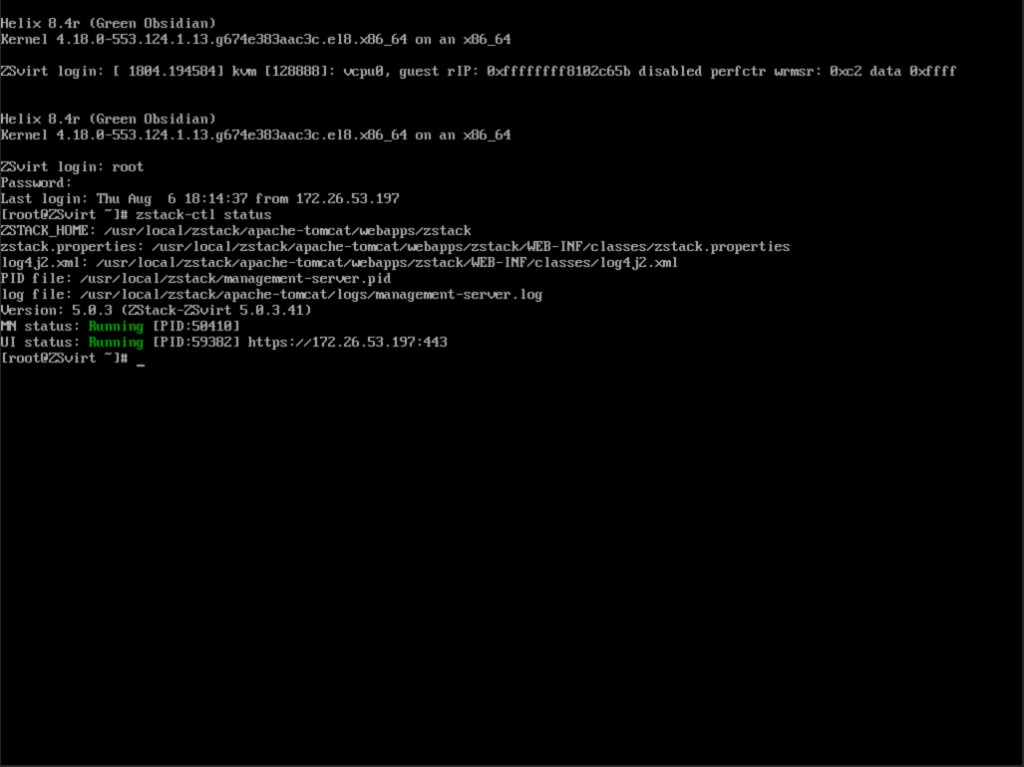
Run the following command to query the management node status:
[root@localhost ~]# zstack-ctl statusWhen the management node is running, the expected output is as follows:
MN status: Running
UI status: Running
-